Create actions
**actions are individual tasks that can be combined to create jobs and custom workflows. You can create your own actions, or use and customize actions shared by the GitHub community. **
Actions can be created by writing custom code that interacts with your repository in any way you like, including integrating with GitHub’s API and any publicly available third-party API.
You can write your own actions for use in workflows, or share the actions you build with the GitHub community. To share your built actions with everyone, your repository must be public.
Operations can be run directly on the machine or in a Docker container. You can define inputs, outputs, and environment variables for an operation.
Can build Docker containers, JavaScript and composite operations. An operation requires a metadata file that defines the input, output, and main entry point of the operation. The metadata file name must be action.yml or action.yaml. For more information, see “Metadata syntax for GitHub operations.”
docker container operations
Docker containers use GitHub Actions code packaging environments. This creates a more consistent and reliable unit of work because consumers of the operation don’t need to worry about tools or dependencies.
Docker containers allow you to use specific versions of operating systems, dependencies, tools, and code. Docker is ideal for operations that must run within a specific environment configuration because you can customize the operating system and tools.
Release management for operations
If you are developing an action for use by others, we recommend using release management to control how updates are distributed.
Users can expect operational hotfix releases that include necessary critical fixes and security fixes while remaining compatible with their existing workflows. Whenever your changes affect compatibility, you should consider releasing a new major version.
Under this method of release management, users should not reference the default branch of operations because it may contain the latest code and therefore may be unstable.
Instead, you can recommend that users specify a major version when using your action, and only direct them to a more specific version if they encounter problems.
To use a specific action version, users can configure their GitHub action workflow to target a tag, a commit’s SHA, or a branch named after a release.
Use tags for release management
We recommend using tags for operational release management. Using this method, your users can easily differentiate between major and minor versions:
- Create and verify releases on release branches (e.g.
release/v1) before creating release tags (e.g.v1.0.2). - Create releases using semantic versioning
- To the right of the file list, click Releases
- At the top of the page, click Draft New Version.
- To select a label for the release, select the Select Label drop-down menu.
- If you created a new tag, select the Target dropdown and click on the branch that contains the project you want to release.
- In the “Describe this version” field, type a description for your version. If you
@mentionanyone in the description, the published version will contain a Contributors section with a list of avatars of all mentioned users. Alternatively, you can automatically generate release notes by clicking Generate Release Notes. - Alternatively, to include binaries (such as compiled programs) in your build, drag and drop or manually select the files in the Binaries box
- Alternatively, select Set to latest version. If you do not select this option, the latest version label will be automatically assigned based on semantic versioning.
- If you are ready to publish your version, click Publish Version. To work on this version later, click Save Draft. You can then view published or draft releases in the repository’s releases feed. For more information, see “Viewing your repository’s releases and tags” )".
- Move the major version tag (such as
v1,v2) to point to the current version of Git ref. For example:git tag -a v1.4 -m "my version 1.4" - Introducing a new major version tag (
v2) for changes that will break existing workflows. For example, changing the input to an operation would be a breaking change. - Major versions may initially be released with the
betatag to indicate their status, e.g.v2-beta. The-betatag can be removed when ready.
Post form automation with query parameters
To quickly create a publication by automatically populating a new publication form with custom information, you can add query parameters to the URL of the publication form page.
Query parameters are optional parts of the URL that you can customize to share specific web views, such as search filter results, issue templates, or publish form pages on GitHub. To create your own query parameters, you must match key-value pairs.
| Query Parameters | Examples |
| :———– | :———————————– ————————– |
| tag | https://github.com/octo-org/octo-repo/releases/new?tag=v1.0.1 Creates a version based on a tag named “v1.0.1”. |
| target | https://github.com/octo-org/octo-repo/releases/new?target=release-1.0.1 Create a release based on the latest commit to the “release-1.0.1” branch . |
| title | https://github.com/octo-org/octo-repo/releases/new?tag=v1.0.1&title=octo-1.0.1 Created based on the tag named “v1.0.1” Version named “octo-1.0.1”. |
| body | https://github.com/octo-org/octo-repo/releases/new?body=Adds+widgets+support creates a release with the description “Add widgets support” in the body of the release release. |
| prerelease | https://github.com/octo-org/octo-repo/releases/new?prerelease=1 creates a release that will be marked as non-production ready. |
How to quote a version
This example demonstrates how users can reference major version tags:
steps:
     - uses: actions/javascript-action@v1
This example demonstrates how users can reference specific patch version tags:
steps:
     - uses: actions/javascript-action@v1.0.1
Use branches for version management
If you prefer to use branch names for release management, this example shows how to reference named branches:
steps:
     - uses: actions/javascript-action@v1-beta
Use submitted SHA for release management
Each Git commit receives a calculated SHA value that is unique and immutable. Users of your action may prefer to rely on the submitted SHA value, as this approach is more reliable than specifying a label, which may be deleted or moved.
However, this means users will not receive further updates on the operation. You must use the full SHA value submitted, not the abbreviated value.
steps:
     - uses: actions/javascript-action@a824008085750b8e136effc585c3cd6082bd575f
Comparison of GitHub actions and GitHub apps
While both GitHub Actions and GitHub Apps provide ways to build automation and workflow tools, they each have strengths that make them useful in different ways.
GitHub apps:
- Continuous operation and rapid response to events.
- Works well when persistent data is required.
- Best for API requests that are not time consuming.
- Run on servers or computing infrastructure provided by you.
GitHub actions:
- Provides automation to perform continuous integration and continuous deployment.
- Can be run directly in the runner machine or Docker container.
- Can include access to clones of the repository, allowing deployment and release tools, code formatters, and command line tools to access the code.
- No need to deploy code or provision the application.
- There is a simple interface to create and use secrets, which enables actions to interact with third-party services without storing the credentials of the person using the action.
Create docker container actions
You’ll learn about the basic components required to create and operate with packaged Docker containers. To keep this guide focused on the components required for packaging operations, the functionality of the operation code is minimal.
Creating a Dockerfile
In the new hello-world-docker-action directory, create a new Dockerfile file. If you have problems, make sure the file name is capitalized correctly (use uppercase D instead of uppercase f).
# Container image that runs your code
FROM alpine:3.10

# Copies your code file from your action repository to the filesystem path `/` of the container
COPY entrypoint.sh /entrypoint.sh

# Code file to execute when the docker container starts up (`entrypoint.sh`)
ENTRYPOINT ["/entrypoint.sh"]
Metadata actions syntax
All operations require a metadata file. The metadata file name must be action.yml or action.yaml. The data in the metadata file defines the input, output, and run configuration for your action.
- name: required. The name of your operation. The
nameGitHub displays in the Operations tab to help visually identify the operations within each job. - description: optional. Provide a brief description of your action. GitHub will display this description on the action’s details page.
- author: optional. The author or organization name of the action.
- inputs: optional. Define input parameters for the operation. Each input is a key-value pair, where the key is the parameter name and the value is the attribute describing the parameter. Attributes include
description,requiredanddefault. - outputs: optional. Define the output parameters of the operation. Each output is a key-value pair, where the key is the parameter name and the value is the attribute describing the parameter. Attributes include
descriptionandvalue. - runs: required. Define the operation’s run configuration. A run configuration specifies the operating system and environment in which the operation should run. Run configuration includes
using,imageandargs. - branding: OPTIONAL You can create badges using colors and [Feathericons.com/] icons to personalize and differentiate your operations. The badge appears next to your action name in GitHub Marketplace.
Specify input:
inputs:
   num-octocats:
     description: 'Number of Octocats'
     required: false
     default: '1'
   octocat-eye-color:
     description: 'Eye color of the Octocats'
     required: true
This example configures two inputs: num-octocats and octocat-eye-color. The input num-octocats is not required and has a default value of “1”; octocat-eye-color is required and has no default value. Workflow files that use this operation must use the with keyword to set the input value octocat-eye-color.
When you specify an input in a workflow file or use default input values, GitHub creates an environment variable named INPUT_<VARIABLE_NAME> for the input. The environment variable created converts the input name to uppercase letters and replaces spaces with _ characters.
If the action is written using composite, it will not automatically get INPUT_<VARIABLE_NAME>. If no conversion occurs, you can change these inputs manually.
To access environment variables in a Docker container action, you must pass input using the args keyword in the action metadata file. For more information about the action metadata files for Docker container actions, see “[Creating a Docker Container Action](https://docs.github.com/en/actions/creating-actions/creating-a-docker-container- action#creating-an-action-metadata-file)”.
For example, if the workflow defines num-octocats and input, the action code can use the and environment variable octocat-eye-color to read the input value. INPUT_NUM-OCTOCATS INPUT_OCTOCAT-EYE-COLOR
parameter:
inputs.<input_id>: RequiredstringThe identifier associated with the input. The value of<input_id>is a mapping of input metadata.<input_id>must be a unique identifier within the objectinputs.<input_id>must start with the letters or,_and contain only alphanumeric characters ,-or_.inputs.<input_id>.description: Requiredstringdescription of the input parameter.
inputs.<input_id>.required: Indicates whether the input parameter is required. If true, the value of the input parameter must be provided when running the workflow, otherwise the workflow will fail.inputs.<input_id>.default: Represents the default value of the input parameter, which is used if the value of the input parameter is not provided when running the workflow.inputs.<input_id>.env: Indicates that the value of the input parameter is passed to the step in the workflow as an environment variable. For example, you can use${{ env.INPUT_NAME }}to reference the value of the input parameter in the step.inputs.<input_id>.group: Indicates grouping the input parameters. Multiple input parameters can be grouped into the same group to better organize and display them.
Create operation metadata file
Create a new action.yml file in the hello-world-docker-action directory created above.
#action.yml
name: 'Hello World'
description: 'Greet someone and record the time'
inputs:
   who-to-greet: # id of input
     description: 'Who to greet'
     required: true
     default: 'World'
outputs:
   time: #id of output
     description: 'The time we greeted you'
runs:
   using: 'docker'
   image: 'Dockerfile'
   args:
     - ${{ inputs.who-to-greet }}
This metadata defines a who-to-greet input and a time output parameter. To pass inputs to a Docker container, you should declare the inputs using inputs and pass the inputs in the args keyword. Everything you include in args will be passed to the container, but to allow users to better discover your actions, we recommend using inputs.
GitHub will build an image from your Dockerfile and use this image to run commands in the new container.
Write operation code
You can choose any base Docker image, and therefore, your operations can be in any language. The following shell script example uses the who-to-greet input variable to print “Hello [who-to-greet]” in a log file.
Next, the script gets the current time and sets it as an output variable that can be used by operations that run later in the job. In order for GitHub to recognize output variables, you must write them to the $GITHUB_OUTPUT environment file: echo "<output name>=<value>" >> $GITHUB_OUTPUT . For more information, see “How GitHub Actions Work” stream command."
Create a new
entrypoint.shfile in thehello-world-docker-actiondirectory.Add the following code to the
entrypoint.shfile.#!/bin/sh -l echo "Hello $1" time=$(date) echo "time=$time" >> $GITHUB_OUTPUTIf
entrypoint.shexecutes without any errors, the operation’s status is set tosuccess. You can also set the exit code explicitly in the operation code to provide the status of the operation. For more information, see “Set the exit code for an operation.”Make your
entrypoint.shfile executable. Git provides a way to explicitly change the permission mode of a file so that it doesn’t get reset every time there is a clone/fork.$ git add entrypoint.sh $ git update-index --chmod=+x entrypoint.shOptionally, to check the permission mode of files in the git index, run the following command.
$ git ls-files --stage entrypoint.sh
Test your actions in a workflow
Now you are ready to test your actions in the workflow.
- Public actions can be used by workflows in any repository.
The following workflow code uses the completed hello world action from the public actions/hello-world-docker-action repository. Copy the following workflow example code into the .github/workflows/main.yml file, but replace actions/hello-world-docker-action with your repository and action names. You can also replace the who-to-greet input with your name. Public actions are available even if they are not published to GitHub Marketplace. For more information, see “Publish actions in GitHub Marketplace.”
on: [push]

jobs:
   hello_world_job:
     runs-on: ubuntu-latest
     name: A job to say hello
     steps:
       - name: Hello world action step
         ID: hello
         uses: actions/hello-world-docker-action@v2
         with:
           who-to-greet: 'Mona the Octocat'
       # Use the output from the `hello` step
       - name: Get the output time
         run: echo "The time was ${{ steps.hello.outputs.time }}"
From the repository, click the Actions tab and select the latest workflow run. Under Assignments or in the visualization, click Assignments to say hello.
Click the Hello world step and you should see “Hello Mona the Octocat” or the name you used for the who-to-greet input printed in the log. Click Get output time to view the timestamp.
Use workflow
GitHub Marketplace is a central place where you can find actions created by the GitHub community. The GitHub Marketplace page allows you to filter actions by category.
The actions you use in your workflow can be defined in:
-Same repository as workflow files
- any public repository
- Docker container images published on Docker Hub
Browse Marketplace actions in the workflow editor
You can search and browse actions directly in the repository’s workflow editor. From the sidebar, you can search for specific actions, view featured actions, and browse featured categories. You can also view the number of stars an action has received from the GitHub community.
- In the repository, browse to the workflow file that you want to edit.
- In the upper right corner of the file view, to open the workflow editor, click
- On the right side of the editor, use the GitHub Marketplace sidebar to browse operations. The badge indicates that GitHub has verified the creator of the action as a partner organization.
Add operations to workflow Add operations to workflow
Actions can be added to a workflow by referencing the actions in the workflow file.
You can view actions referenced in a GitHub Actions workflow as dependencies in the dependency graph of the repository containing the workflow. For more information, see “[About the dependency graph](https://docs.github.com/en/code-security/supply-chain-security/understanding-your-software-supply-chain/about-the- dependency-graph)”.
Add actions from GitHub Marketplace
The action’s list page includes the action’s version and the workflow syntax required to use the action. To keep your workflow stable even if updates are made to the operation, you can reference the version of the operation you want to use by specifying a Git or Docker tag number in the workflow file.
Navigate to the action you want to use in the workflow.
Click to see the full market list of operations.
Under Installation, click Copy workflow syntax.

Paste the syntax as a new step in the workflow. For more information, see “Workflow Syntax for GitHub Actions. "
If the action requires input from you, set them up in the workflow. For information about the inputs that actions may require, see “[Finding and customizing actions”](https://docs.github.com/en/actions/learn-github-actions/finding-and-customizing-actions#using -inputs-and-outputs-with-an-action). "
You can also enable Dependabot version updates for actions added to your workflow. For more information, see “[Keeping your actions up to date with Dependabot](https://docs.github.com/en/code-security/dependabot/working-with-dependabot/keeping-your-actions-up-to -date-with-dependabot).”
Add operations from the same repository
If the action is defined in the same repository where the workflow file uses the action, it can be referenced in the workflow file using {owner}/{repo}@{ref} or ./path/to/dir syntax operate.
Repository file structure example:
|-- hello-world (repository)
| |__ .github
| └── workflows
| └── my-first-workflow.yml
| └── actions
| |__ hello-world-action
| └── action.yml
Workflow file example:
jobs:
   build:
     runs-on: ubuntu-latest
     steps:
       # This step checks out a copy of your repository.
       - uses: actions/checkout@v3
       # This step references the directory that contains the action.
       - uses: ./.github/actions/hello-world-action
The action.yml file is used to provide metadata for actions. In “Metadata syntax for GitHub Actions.”
Add actions from other repositories
If an action is defined in a different repository than the workflow file, the action can be referenced in the workflow file using the {owner}/{repo}@{ref} syntax.
Operations must be stored in a public repository.
jobs:
   my_first_job:
     steps:
       - name: My first step
         uses: actions/setup-node@v3
Reference the container on Docker Hub
If an action is defined in a Docker container image published on Docker Hub, the action must be referenced in the workflow file using the docker://{image}:{tag} syntax. To protect your code and data, we strongly recommend that you verify the integrity of a Docker container image from Docker Hub before using it in your workflow.
jobs:
   my_first_job:
     steps:
       - name: My first step
         uses: docker://alpine:3.8
For some examples of Docker actions, see Docker-image.yml workflow and “Creating a Docker Container Actions.”
Basic characteristics of action
GitHub Actions allows you to customize workflows to meet the unique needs of your application and team. Such as using variables, running scripts, and sharing data and artifacts between jobs.
Using variables in workflow
GitHub Actions includes default environment variables for each workflow run. If you need to use custom environment variables, you can set these variables in the YAML workflow file. This example demonstrates how to create custom variables named POSTGRES_HOST and POSTGRES_PORT. These variables are then available to the node client.js script.
jobs:
   example-job:
       steps:
         - name: Connect to PostgreSQL
           run: node client.js
           env:
             POSTGRES_HOST: postgres
             POSTGRES_PORT: 5432
Add script to workflow
You can use actions to run scripts and shell commands and then execute those commands on the assigned runner. This example demonstrates how an action can use the run keyword to execute npm install -g bats on the runner.
jobs:
   example-job:
     steps:
       - run: npm install -g bats
For example, to run a script as an action, you can store the script in a repository and provide the path and shell type.
jobs:
   example-job:
     steps:
       - name: Run build script
         run: ./.github/scripts/build.sh
         shell: bash
For more information, see “Workflow Syntax for GitHub Actions.”
Share data between jobs
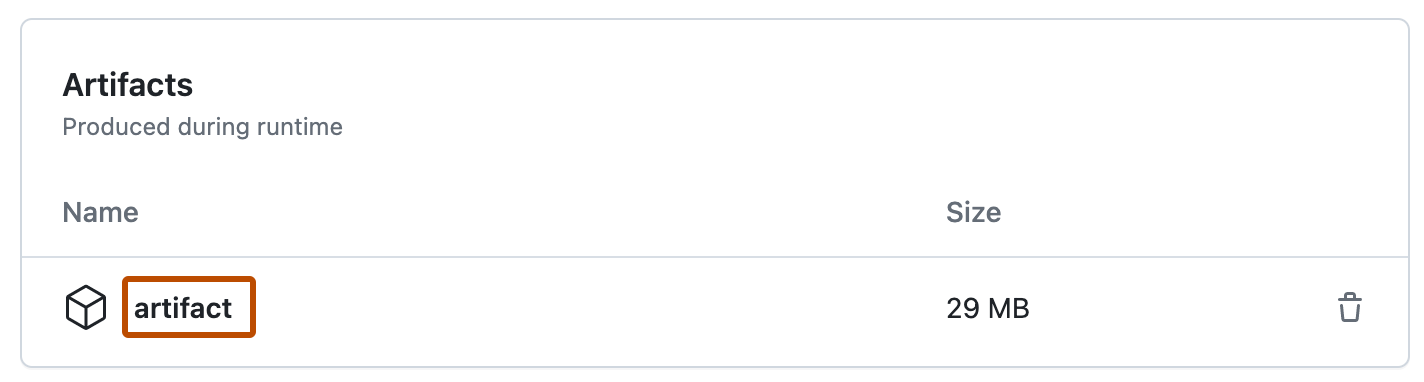
If your job generates files that you want to share with another job in the same workflow, or you want to save these files for later reference, you can store them as artifacts in GitHub. Artifacts are files created when code is built and tested. For example, artifacts might include binary or package files, test results, screenshots, or log files. Artifacts are associated with the workflow run that created them and can be used by other jobs. All operations and workflows invoked within a run have write access to the run’s artifacts.
For example, you can create a file and then upload it as an artifact.
jobs:
   example-job:
     name: Save output
     steps:
       - shell: bash
         run: |
                      expr 1 + 1 > output.log
       - name: Upload output file
         uses: actions/upload-artifact@v3
         with:
           name: output-log-file
           path: output.log
To download artifacts from a separate workflow run, you can use the actions/download-artifact action. For example, you can download an artifact named output-log-file.
jobs:
   example-job:
     steps:
       - name: Download a single artifact
         uses: actions/download-artifact@v3
         with:
           name: output-log-file
To download artifacts from the same workflow run, your download job should specify needs: upload-job-name so that it does not start until the upload job completes.
For more information about artifacts, see “Storing Workflow Data as Artifacts.”
context
Context, what does the context in github actions look like?
Context is a way to access information about a workflow run, variables, runner environment, jobs, and steps. Each context is an object containing properties, which can be strings or other objects.
Contexts, objects, and properties can vary significantly under different workflow running conditions. For example, the matrix context is populated only for jobs in the matrix.
It may still not be clear, let’s look directly at when to use context:
GitHub Actions contains a variable collection called context and a similar variable collection called default variables. These variables are used at different points in the workflow:
- Default environment variables: These environment variables only exist on the runner that executes the job. For more information, see “Variables.”
- Context: You can use most contexts at any time in the workflow, including when default variables are not available. For example, you can use a context with an expression to perform initial processing before routing the job to the runner for execution; this allows you to use a context with the conditional
ifkeyword to determine whether a certain step should be run. Once the job starts running, you can also retrieve context variables from the runner that is executing the job, such asrunner.os. For more information about where various contexts can be used in workflows, see “Contexts.”
The following example demonstrates how to use these different types of variables together in a job:
name: CI
on: push
jobs:
   prod-check:
     if: ${{ github.ref == 'refs/heads/main' }}
     runs-on: ubuntu-latest
     steps:
       - run: echo "Deploying to production server on branch $GITHUB_REF"
In this example, the if statement checks the github.ref context to determine the current branch name; if the name is refs/heads/main , subsequent steps are performed. The if check is handled by GitHub Actions, and the job will be sent to the runner only if the result is true. This step is executed once the job is sent to the runner, referencing the $GITHUB_REF variable from the runner.
Context availability
Different contexts can be used throughout a workflow run. For example, the secrets context can be used only at certain locations within the job.
Additionally, some features may only be available in certain locations. For example, the hashFiles function is not available everywhere.
| Workflow key workflow key | Context context | Special functions Special functions |
| :———————————————— - | :————————————————– ———- | :—————————————- ———- |
| run-name | github, inputs, vars | None None |
| concurrency | github, inputs, vars | None None |
| env | github, secrets, inputs, vars | None None |
| jobs.<job_id>.concurrency | github, needs, strategy, matrix, inputs, vars | None None |
| jobs.<job_id>.container | github, needs, strategy, matrix, vars, inputs | None None |
| jobs.<job_id>.container.credentials | github, needs, strategy, matrix, env, vars, secrets, inputs | None None |
| jobs.<job_id>.container.env.<env_id> | github, needs, strategy, matrix, job, runner, env, vars, secrets, inputs | None None |
| jobs.<job_id>.container.image | github, needs, strategy, matrix, vars, inputs | None None |
| jobs.<job_id>.continue-on-error | github, needs, strategy, vars, matrix, inputs | None None |
| jobs.<job_id>.defaults.run | github, needs, strategy, matrix, env, vars, inputs | None None |
| jobs.<job_id>.env | github, needs, strategy, matrix, vars, secrets, inputs | None None |
| jobs.<job_id>.environment | github, needs, strategy, matrix, vars, inputs | None None |
| jobs.<job_id>.environment.url | github, needs, strategy, matrix, job, runner, env, vars, steps, inputs | None None |
| jobs.<job_id>.if | github, needs, vars, inputs | always, canceled, success, failure |
| jobs.<job_id>.name | github, needs, strategy, matrix, vars, inputs | None None |
| jobs.<job_id>.outputs.<output_id> | github, needs, strategy, matrix, job, runner, env, vars, secrets, steps, inputs | None None |
| jobs.<job_id>.runs-on | github, needs, strategy, matrix, vars, inputs | None None |
| jobs.<job_id>.secrets.<secrets_id> | github, needs, strategy, matrix, secrets, inputs, vars | None None |
| jobs.<job_id>.services | github, needs, strategy, matrix, vars, inputs | None None |
| jobs.<job_id>.services.<service_id>.credentials | github, needs, strategy, matrix, env, vars, secrets, inputs | None None |
| jobs.<job_id>.services.<service_id>.env.<env_id> | github, needs, strategy, matrix, job, runner, env, vars, secrets, inputs | None None |
| jobs.<job_id>.steps.continue-on-error | github, needs, strategy, matrix, job, runner, env, vars, secrets, steps, inputs | hashFiles |
| jobs.<job_id>.steps.env | github, needs, strategy, matrix, job, runner, env, vars, secrets, steps, inputs | hashFiles |
| jobs.<job_id>.steps.if | github, needs, strategy, matrix, job, runner, env, vars, steps, inputs | always, canceled, success, failure, hashFiles |
| jobs.<job_id>.steps.name | github, needs, strategy, matrix, job, runner, env, vars, secrets, steps, inputs | hashFiles |
| jobs.<job_id>.steps.run | github, needs, strategy, matrix, job, runner, env, vars, secrets, steps, inputs | hashFiles |
| jobs.<job_id>.steps.timeout-minutes | github, needs, strategy, matrix, job, runner, env, vars, secrets, steps, inputs | hashFiles |
| jobs.<job_id>.steps.with | github, needs, strategy, matrix, job, runner, env, vars, secrets, steps, inputs | hashFiles |
| jobs.<job_id>.steps.working-directory | github, needs, strategy, matrix, job, runner, env, vars, secrets, steps, inputs | hashFiles |
| jobs.<job_id>.strategy | github, needs, vars, inputs | None 无 |
| jobs.<job_id>.timeout-minutes | github, needs, strategy, matrix, vars, inputs | None 无 |
| jobs.<job_id>.with.<with_id> | github, needs, strategy, matrix, inputs, vars | None 无 |
| on.workflow_call.inputs.<inputs_id>.default | github, inputs, vars | None 无 |
| on.workflow_call.outputs.<output_id>.value | github, jobs, vars, inputs | None 无 |
GitHub context
github 上下文包含有关工作流运行和触发运行的事件的信息。你还可以在环境变量中读取大部分 github 上下文数据。有关环境变量的详细信息,请参阅“变量。“
| 物业名称 | 类型 | 描述 |
|---|---|---|
github | object | 工作流中任何作业或步骤期间可用的顶级上下文。该对象包含下面列出的所有属性。 |
github.action | string | 当前正在运行的操作的名称或id步骤的名称。GitHub 会删除特殊字符,并__run在当前步骤运行不带id. 如果你在同一个作业中多次使用相同的操作,则名称将包含一个后缀,其序列号前面带有下划线。例如,你运行的第一个脚本的名称为__run,第二个脚本的名称为__run_2。同样,第二次调用actions/checkoutwill 是actionscheckout2。 |
github.action_path | string | 动作所在的路径。此属性仅在复合操作中受支持。你可以使用此路径访问与操作位于同一存储库中的文件,例如通过将目录更改为路径: cd ${{ github.action_path }}。 |
github.action_ref | string | 对于执行操作的步骤,这是正在执行的操作的引用。例如,v2. |
github.action_repository | string | 对于执行操作的步骤,这是操作的所有者和存储库名称。例如,actions/checkout. |
github.action_status | string | 对于复合操作,复合操作的当前结果。 |
github.actor | string | 触发初始工作流运行的用户的用户名。如果工作流运行是重新运行,则该值可能与 不同github.triggering_actor。任何工作流重新运行都将使用 的权限github.actor,即使发起重新运行的参与者 ( github.triggering_actor) 具有不同的权限。 |
github.actor_id | string | 触发初始工作流程运行的人员或应用程序的帐户 ID。例如,1234567. 请注意,这与演员用户名不同。 |
github.api_url | string | GitHub REST API 的 URL。 |
github.base_ref | string | base_ref工作流运行中拉取请求的或目标分支。仅当触发工作流运行的事件为 或 时,此属性才可pull_request用。pull_request_target |
github.env | string | 运行器上从工作流命令设置环境变量的文件的路径。该文件对于当前步骤是唯一的,并且是作业中每个步骤的不同文件。有关更多信息,请参阅“ GitHub Actions 的工作流程命令”。 |
github.event | object | 完整的事件 Webhook 负载。你可以使用此上下文访问事件的各个属性。该对象与触发工作流运行的事件的 Webhook 负载相同,并且对于每个事件都不同。 每个 GitHub Actions 事件的 Webhook 都链接在“触发工作流的事件”中。例如,对于由事件触发的工作流运行push,该对象包含推送 webhook 负载的内容。 |
github.event_name | string | 触发工作流运行的事件的名称。 |
github.event_path | string | 运行器上包含完整事件 Webhook 负载的文件的路径。 |
github.graphql_url | string | GitHub GraphQL API 的 URL。 |
github.head_ref | string | head_ref工作流运行中拉取请求的或源分支。仅当触发工作流运行的事件为 或 时,此属性才可pull_request用。pull_request_target |
github.job | string | job_id当前工作的。 注意:此上下文属性由操作运行器设置,并且仅在steps作业执行期间可用。否则,该属性的值为null。 |
github.job_workflow_sha | string | 对于使用可重用工作流程的作业,可重用工作流程文件的提交 SHA。 |
github.path | string | 运行器上从工作流命令设置系统变量的文件的路径PATH。该文件对于当前步骤是唯一的,并且是作业中每个步骤的不同文件。有关更多信息,请参阅“ GitHub Actions 的工作流程命令”。 |
github.ref | string | 触发工作流运行的分支或标签的完整引用。对于 触发的工作流程push,这是推送的分支或标签引用。对于 触发的工作流程pull_request,这是拉取请求合并分支。对于由 触发的工作流程release,这是创建的发布标签。对于其他触发器,这是触发工作流运行的分支或标记引用。仅当分支或标签可用于事件类型时才设置此值。给出的 ref 是完全形成的,这意味着对于分支,格式是,对于拉取请求,格式是,对于标签,格式是。例如,.refs/heads/<branch_name>``refs/pull/<pr_number>/merge``refs/tags/<tag_name>``refs/heads/feature-branch-1 |
github.ref_name | string | The short reference name of the branch or tag that triggered the workflow to run. This value matches the branch or tag name displayed on GitHub. For example, feature-branch-1. |
github.ref_protected | boolean | true Whether branch protection is configured for the reference that triggers the workflow run. |
github.ref_type | string | The reference type that triggers the workflow to run. Valid values are branch or tag. |
github.repository | string | Owner and repository name. For example, .octocat/Hello-World |
github.repository_id | string | The ID of the repository. For example, 123456789. Note that this is different from the repository name. |
github.repository_owner | string | The username of the repository owner. For example, octocat. |
github.repository_owner_id | string | The account ID of the repository owner. For example, 1234567. Note that this is different from the owner’s name. |
github.repositoryUrl | string | The Git URL of the repository. For example, .git://github.com/octocat/hello-world.git |
github.retention_days | string | The number of days to retain workflow run logs and artifacts. |
github.run_id | string | A unique number for each workflow run in the repository. This number does not change if you rerun the workflow. |
github.run_number | string | A unique number for each run of a specific workflow in the repository. This number starts at 1 for the first run of the workflow and increments with each new run. This number does not change if you rerun the workflow. |
github.run_attempt | string | A unique number for each attempt to run a specific workflow in the repository. This number starts at 1 for the first time the workflow attempts to run, and increments with each rerun. |
github.secret_source | string | The source of the secret used in the workflow. Possible values are None, Actions, Codespaces or Dependabot. |
github.server_url | string | The URL of the GitHub server. For example: .https://github.com |
github.sha | string | The commit SHA that triggered the workflow. The value of this commit SHA depends on the event that triggered the workflow. For more information, see “Events that trigger workflows”. For example, ffac537e6cbbf934b08745a378932722df287a53. |
github.token | string | A token that authenticates on behalf of the GitHub application installed on the repository. This is functionally equivalent to the GITHUB_TOKEN secret. For more information, see “Automatic Token Authentication”. Note: This context property is set by the action runner and is only available during steps job execution. Otherwise, the value of this attribute is null. |
github.triggering_actor | string | The username of the user who initiated the workflow run. If the workflow run is a rerun, this value may differ from github.actor. Any workflow rerun will use the permissions of github.actor, even if the actor initiating the rerun (github.triggering_actor) has different permissions. |
github.workflow | string | The name of the workflow. If the workflow file does not specify a name, the value of this property is the full path to the workflow file in the repository. |
github.workflow_ref | string | The reference path of the workflow. For example, .octocat/hello-world/.github/workflows/my-workflow.yml@refs/heads/my_branch |
github.workflow_sha | string | The commit SHA of the workflow file. |
github.workspace | string | The default working directory on the step runner, and the default location of the repository when using actions checkout. |
Some functional cases
| Features | Execution |
| :———————————– | :———– ———————————————— |
| Trigger the workflow to run automatically | push |
| Trigger the workflow to run automatically | pull_request |
| Run a workflow manually from the UI | workflow_dispatch |
| Set token permissions | permissions |
| Control the number of workflows or jobs that can run simultaneously | concurrency |
| Choosing the runner for a job based on repository | runs-on |
| Clone your repository into the runner | actions/checkout |
| Install node on the runner | actions/setup-node |
| Using third-party actions | trilom/file-changes-action |
| Run the script on the runner | Use ./script/rendered-content-link-checker.mjs |
actions advanced functions
This section briefly introduces some of the advanced features of GitHub Actions to help you create more complex workflows.
Save secret
If your workflow uses sensitive data (such as passwords or certificates), you can save this data as secrets in GitHub and then use them as environment variables in your workflow. This means you’ll be able to create and share workflows without embedding sensitive values directly into the workflow’s YAML source.
This sample job demonstrates how to reference an existing key as an environment variable and send it as an argument to a sample command.
jobs:
   example-job:
     runs-on: ubuntu-latest
     steps:
       - name: Retrieve secret
         env:
           super_secret: ${{ secrets.SUPERSECRET }}
         run: |
                      example-command "$super_secret"
Create dependency work
By default, jobs in a workflow all run simultaneously in parallel. If your job must run only after another job completes, you can create this dependency using the keyword needs. If one of the jobs fails, all related jobs are skipped; however, if you need to continue the job, you can define this using an if conditional statement.
In this example, setup, build, and test jobs run in series, and build depends on test on whether the job before them completes successfully:
jobs:
   setup:
     runs-on: ubuntu-latest
     steps:
       - run: ./setup_server.sh
   build:
     needs: setup
     runs-on: ubuntu-latest
     steps:
       - run: ./build_server.sh
   test:
     needs: build
     runs-on: ubuntu-latest
     steps:
       - run: ./test_server.sh
For more information, see “Using jobs in workflows”.
Using matrix
Matrix strategies allow you to use variables in a single job definition to automatically create multiple job runs based on combinations of variables. For example, you can use a matrix strategy to test your code on multiple versions of a language or on multiple operating systems. The matrix is created using the strategy keyword, which receives the build options as an array. For example, this matrix will run a job multiple times using different versions of Node.js:
jobs:
   build:
     runs-on: ubuntu-latest
     strategy:
       matrix:
         node: [12, 14, 16]
     steps:
       - uses: actions/setup-node@v3
         with:
           node-version: ${{ matrix.node }}
For more information, see “Using a matrix for your jobs”.
Caching dependencies
If your jobs frequently reuse dependencies, you may consider caching these files to help improve performance. Once a cache is created, it is available to all workflows in the same repository.
This example demonstrates how to cache the ~/.npm directory:
jobs:
   example-job:
     steps:
       - name: Cache node modules
         uses: actions/cache@v3
         env:
           cache-name: cache-node-modules
         with:
           path: ~/.npm
           key: ${{ runner.os }}-build-${{ env.cache-name }}-${{ hashFiles('**/package-lock.json') }}
           restore-keys: |
                          ${{ runner.os }}-build-${{ env.cache-name }}-
For more information, see “Caching dependencies to speed up workflows”.
Using database and service containers
If your job requires database or caching services, you can create them using the keyword services A temporary container to host the service; the resulting container is then available for all steps in the job and is deleted when the job completes. This example demonstrates how a job can be used in services to create a postgres container, which is then used in node to connect to the service.
jobs:
   container-job:
     runs-on: ubuntu-latest
     container: node:10.18-jessie
     services:
       postgres:
         image: postgres
     steps:
       - name: Check out repository code
         uses: actions/checkout@v3
       - name: Install dependencies
         run: npm ci
       - name: Connect to PostgreSQL
         run: node client.js
         env:
           POSTGRES_HOST: postgres
           POSTGRES_PORT: 5432
For more information, see “Using containerized services”.
Use tags to route workflows
If you want to ensure that a specific type of runner will process your job, you can use tags to control where the job executes. In addition to the default label, you can assign the label self-hosted to a self-hosted runner. You can then reference these tags in YAML workflows to ensure jobs are routed predictably. GitHub-hosted runners have predefined tags assigned to them.
This example shows how a workflow can use labels to specify the required runners:
jobs:
   example-job:
     runs-on: [self-hosted, linux, x64, gpu]
The workflow will only run on runners with all tags in the runs-on array. The job will be given priority to an idle self-hosted runner with the specified label. If no GitHub managed runner is available and exists with the specified label, the job will go to the GitHub managed runner.
To learn more about self-hosted runners tags, see “[Using tags with self-hosted runners](https://docs.github.com/en/actions/hosting-your-own-runners/ managing-self-hosted-runners/using-labels-with-self-hosted-runners)”.
To learn more about the GitHub Hosted Runners tag, see “[About GitHub Hosted Runners](https://docs.github.com/en/actions/using-github-hosted-runners/about- github-hosted-runners#supported-runners-and-hardware-resources)”.
Reuse workflows
You can call one workflow from another. This allows you to reuse workflows, avoid duplication and make workflows easier to maintain. For more information, see “Reusing Workflows”.
Usage environment
You can configure your environment with protection rules and secrets to control the execution of jobs in your workflow. Each job in a workflow can reference a single environment. Any protection rules configured for the environment must pass before a job that references the environment is sent to the runner. For more information, see “Using Deployment Environments”.
Concurrent work
You can use it jobs.<job_id>.concurrency to ensure that only one job or workflow using the same concurrency group is running at a time. A concurrency group can be any string or expression. Allowed expression contexts: github, [inputs](https://docs .github.com/en/actions/learn-github-actions/contexts#inputs-context), [vars](https://docs.github.com/en/actions/learn-github-actions/contexts# vars-context), needs, [strategy](https://docs. github.com/en/actions/learn-github-actions/contexts#strategy-context) and [matrix](https://docs.github.com/en/actions/learn-github-actions/contexts#matrix -context). For more information about expressions, see “Expressions”.
You can also specify concurrency at the workflow level. See concurrency for details.
When a concurrent job or workflow is queued, if another job or workflow using the same concurrency group in the repository is in progress, the queued job or workflow will be pending. Any previously suspended jobs or workflows in the concurrent group will be cancelled. To also cancel any currently running jobs or workflows in the same concurrency group, specify cancel-in-progress: true.
Example: Using concurrency and default behavior
concurrency: staging_environment
concurrency: ci-${{ github.ref }}
Example: Cancel any in-progress job or run using concurrency
concurrency:
   group: ${{ github.ref }}
   cancel-in-progress: true
Run in container
Use jobs.<job_id>.container to create a container to run any steps in the job that do not already have a container specified. If you have steps that use both a script and a container action, the container action will run as a sibling container on the same network with the same volume mount.
If you do not set a container, all steps will run directly on the specified host runs-on unless the step references an operation configured to run in a container.
Case:
name: CI
on:
   push:
     branches: [main]
jobs:
   container-test-job:
     runs-on: ubuntu-latest
     container:
       image: node:14.16
       env:
         NODE_ENV: development
       ports:
         - 80
       volumes:
         - my_docker_volume:/volume_mount
       options: --cpus 1
     steps:
       - name: Check for dockerenv file
         run: (ls /.dockerenv && echo Found dockerenv) || (echo No dockerenv)
The image keyword can be omitted when you specify only the container image.
jobs:
   container-test-job:
     runs-on: ubuntu-latest
     container: node:14.16
Define container image
for jobs.<job_id>.container.image defines the Docker image used as the container to run the operation. The value can be a Docker Hub image name or a registry name.
If the image’s container registry requires authentication to pull the image, you can use the and jobs.<job_id>.container.credentials settings. The credentials are the same values you provide to the command.
map username password docker login
Use environment variables with containers
Used to set a series of environment variables in the container jobs.<job_id>.container.env. map
Mount the volume in the container:
Used in jobs.<job_id>.container.volumes to set the volumes used by the array container. You can use volumes to share data between services or other steps in a job. You can specify named Docker volumes, anonymous Docker volumes, or bind mounts on the host.
To specify a volume, specify the source and destination paths:
<source>:<destinationPath>.
is the volume name or absolute path on the host and is the absolute path in the container.
Example: Mount a volume in a container
volumes:
   - my_docker_volume:/volume_mount
   -/data/my_data
   - /source/directory:/destination/directory
Define default settings that will apply to all jobs in a workflow or all steps in a job
When multiple defaults are defined with the same name, GitHub will use the most specific default. For example, a default setting defined in a job will override a default setting with the same name defined in a workflow.
Set default shell and working directory
Use jobs.<job_id>.defaults to create a map with default settings that will be applied to all steps in the job. You can also set default settings for your entire workflow. See defaults https://docs.github.com/en/actions/using-workflows/workflow-syntax-for-github-actions#defaults for details.
When multiple defaults are defined with the same name, GitHub uses the most specific default. For example, a default setting defined in a job will override a default setting of the same name defined in a workflow.
Set the default shell and working directory of the job
Used in jobs.<job_id>.defaults.run to provide default values for all run steps in the shell working-directory in a job. Contexts and expressions are not allowed in this section.
The default shell and working-directory options run can be provided for all steps in a job. It is also possible to run to set default settings for the entire workflow. See jobs.defaults.run for details. You cannot use context or expressions in this keyword.
When multiple defaults are defined with the same name, GitHub uses the most specific default. For example, a default setting defined in a job will override a default setting of the same name defined in a workflow.
Set the default step options for run jobs
jobs:
   job1:
     runs-on: ubuntu-latest
     defaults:
       run:
         shell: bash
         working-directory: scripts
Assign permissions to jobs
You can use permissions to modify the default permissions granted by GITHUB_TOKEN, adding or removing access rights as needed so that only the minimum required access is allowed. For more information, see “Automatic token authentication.”
You can use this as the permissions top-level keyword to apply to all jobs in a workflow or to jobs within a specific job. When you add a permissions key in a specific job, all operations and run commands used in that job will get the GITHUB_TOKEN access you specify. See jobs.<job_id>.permissions for details.
Available scopes and access values:
permissions:
   actions: read|write|none
   checks: read|write|none
   contents: read|write|none
   deployments: read|write|none
   id-token: read|write|none
   issues: read|write|none
   discussions: read|write|none
   packages: read|write|none
   pages: read|write|none
   pull-requests: read|write|none
   repository-projects: read|write|none
   security-events: read|write|none
   statuses: read|write|none
If access is specified for any of these scopes, all unspecified scopes will be set to none .
Read or write access to all available scopes can be defined using the following syntax:
permissions: read-all|write-all
Permissions can be disabled for all available scopes using the following syntax:
permissions: {}
You can use this key to add and remove read permissions for the derived repository, but generally cannot grant write permissions. permissions key to add and remove read permissions for forked repositories, but typically you can’t grant write access. The exception to this behavior is for admin users who have selected “Send write permissions from pull requests” in GitHub Actions settings Cards to Workflow” option. For more information, see “Manage GitHub Action Settings for a Repository.”
Assign permissions to GITHUB_TOKEN
This example shows permissions set that will apply to all jobs in the workflow. GITHUB_TOKEN This will apply to all jobs in the workflow. All permissions are granted read access.
name: "My workflow"

on: [push]

permissions: read-all

jobs:
   ...
Example: Setting permissions for a specific job
This example shows the permissions set, the GITHUB_TOKEN permission only applies to jobs named stale . and the scope is granted write access to issues pull-requests . All other scopes have no access.
jobs:
   stale:
     runs-on: ubuntu-latest

     permissions:
       issues: write
       pull-requests: write

     steps:
       - uses: actions/stale@v5
Build and Test (CI)
About Continuous Integration (CI):
We have heard the name CICD many times, which stands for Continuous Integration and Continuous Deployment
Continuous integration (CI) is a software practice that requires frequent code commits to a shared repository. Committing code more frequently can detect bugs faster and reduce the amount of code developers need to debug while finding the source of the bug.
Frequent code updates also make it easier to incorporate changes from different members of the software development team. This is great for developers, who can spend more time writing code and less time debugging errors or resolving merge conflicts.
When you commit code to a repository, you can continually build and test the code to ensure your commits don’t introduce bugs.
Testing can include code linking (checking style formatting), security checks, code coverage, functional tests, and other custom checks.
A server is required to build and test your code. You can build and test updates locally before pushing the code to the repository, or you can use a CI server to check the repository for new code commits.
About using GitHub Actions for continuous integration
You can configure your CI workflow to run when a GitHub event occurs (for example, when new code is pushed to the repository), on a set schedule, or use a repository scheduling webhook to run when an external event occurs.
GitHub runs CI tests and provides the results of each test in pull requests, so you can see if changes in your branch introduced bugs. When all configuration item tests in the workflow pass, the changes you push can be reviewed or merged by team members.
When a test fails, it’s likely that one of your changes caused the failure.
When you set up CI in a repository, GitHub analyzes the code in the repository and recommends CI workflows based on the languages and frameworks in the repository. For example, if you use Node.js, GitHub will suggest a startup workflow for installing Node.js packages and running tests. You can use GitHub’s suggested CI starter workflow, customize the suggested starter workflow, or create your own custom workflow file to run CI tests.
In addition to helping you set up CI workflows for your projects, you can use GitHub Actions to create workflows throughout the software development lifecycle. For example, you can use actions to deploy, package, or publish a project. For more information, see “Learn GitHub Actions.”
Starter workflow
GitHub provides CI startup workflows for various languages and frameworks.
Browse the full list of CI starter workflows provided by GitHub in the actions/starter-workflow repository.
About continuous deployment (CD)
Continuous deployment (CD) is the practice of using automation to release and deploy software updates. As part of a typical CD process, code is automatically built and tested before deployment.
You can set up GitHub Actions workflows to deploy your software products. To verify that the product works as expected, your workflow can build the code in the repository and run tests before deploying.
You can configure a CD workflow to run when a GitHub event occurs (for example, when new code is pushed to the repository’s default branch), on a set schedule, manually, or when an external event occurs using a repository scheduling webhook.
Next let’s learn to use github’s actions for continuous deployment:
GitHub Actions provides features that allow you to control deployment. you can:
- Use various events to trigger workflows.
- Configure the environment to set rules and restrict access to secrets before the job continues.
- Use concurrency to control the number of deployments running at one time.
Trigger deployment
You can use various events to trigger deployment workflows. The most common ones are: pull_request, push and workflow_dispatch.
- There is a thrust on the branch
main. - Pull requests targeting branch
mainare opened, synced or reopened. - Someone triggered it manually.
on:
   push:
     branches:
       - main
   pull_request:branches:
       - main
   workflow_dispatch:
Use concurrency
Concurrency ensures that only a single job or workflow using the same concurrency group runs at a time. You can use concurrency so that there is at most one ongoing deployment and one pending deployment in the environment at a time.
For example, when the following workflow runs, pending will be paused with a status of production if any jobs or workflows using the concurrent group production are in progress. It will also cancel any jobs or workflows that use the concurrency group and have status production , pending . This means that a job or workflow using a concurrency group can only have at most one running and one pending in production.
name: Deployment

concurrency: production

on:
   push:
     branches:
       - main

jobs:
   deployment:
     runs-on: ubuntu-latest
     environment: production
     steps:
       - name: deploy
         # ...deployment-specific steps
You can also specify concurrency at the job level. This will allow other jobs in the workflow to continue, even if concurrent jobs are pending .
name: Deployment

on:
   push:
     branches:
       - main

jobs:
   deployment:
     runs-on: ubuntu-latest
     environment: production
     concurrency: production
     steps:
       - name: deploy
         # ...deployment-specific steps
Choosing a runner
You can run deployment workflows on GitHub-hosted runners or self-hosted runners. Traffic from GitHub-hosted runners may originate from a variety of network addresses. If you are deploying to an on-premises environment and your company restricts external traffic to a private network, GitHub Actions workflows running on GitHub-hosted runners may not be able to communicate with your internal services or resources.
About packaging with GitHub Actions
The packaging step is a common part of a continuous integration or continuous delivery workflow. Creating a package at the end of a continuous integration workflow can help during code review of a pull request.
After the code is built and tested, the packaging step can produce runnable or deployable artifacts. Depending on the type of application you are building, this package can be downloaded locally for manual testing, available for users to download, or deployed to a staging or production environment.
For example, a continuous integration workflow for a Java project might run mvn package to generate a JAR file. Alternatively, a CI workflow for a Node.js application might create a Docker container.
Now, when viewing a pull request, you will be able to view the workflow run and download the resulting artifacts.
Workflow of publishing packages
In addition to uploading packaging artifacts for testing in a continuous integration workflow, you can create a workflow that builds the project and publishes the package to the package registry.
Publish packages to GitHub Packages GitHub Packages can act as a package hosting service for many types of packages. You can choose to share your package with all of GitHub, or share a private package with collaborators or organizations. For more information, see “Introduction to GitHub Packages”.
You may want to publish your package to GitHub Packages every time you push to the default branch. This will allow a project’s developers to always easily run and test the latest version of the default branch by installing it from GitHub Packages.
Publish a package to the package registry For many projects, a publish to the package registry is performed whenever a new version of the project is published. For example, a project that generates a JAR file can upload new versions to the Maven central repository. Alternatively, a .NET project might generate a nuget package and upload it to the NuGet Gallery.
You can automate this by creating a workflow that publishes the package to the package registry each time a version is created. For more information, see “Managing releases in a repository”.
Publish Docker image
You can trigger a workflow to publish an image every time you create a new version on GitHub. The workflow in the following example runs created when an event of activity type release is fired. For more information about the release event, see “Events that trigger workflows” .
In the example workflow below, we use the Docker login-action and build-push-action actions to build a Docker image and, if the build is successful, push the built image to Docker Hub.
To push to Docker Hub, you need to have a Docker Hub account and create a Docker Hub repository. For more information, see “Pushing Docker container images to Docker Hub” in the Docker documentation. ](https://docs.docker.com/docker-hub/repos/#pushing-a-docker-container-image-to-docker-hub)
login-action The required options for Docker Hub are:
usernameandpassword: These are your Docker Hub username and password. We recommend storing your Docker Hub username and password as secret so they are not exposed in your workflow files. For more information, see “Encrypted Secrets”.
metadata-action The required options for Docker Hub are:
images: The namespace and name of the Docker image you are building/pushing to Docker Hub.
build-push-action The required options for Docker Hub are:
tags: Tags for new image formatDOCKER-HUB-NAMESPACE/DOCKER-HUB-REPOSITORY:VERSION. You can set a single label as shown below, or specify multiple labels in a list.push: If set totrue, the image will be pushed to the registry after it is successfully built.
name: Publish Docker image

on:
   release:
     types: [published]

jobs:
   push_to_registry:
     name: Push Docker image to Docker Hub
     runs-on: ubuntu-latest
     steps:
       - name: Check out the repo
         uses: actions/checkout@v3

       - name: Log in to Docker Hub
         uses: docker/login-action@f4ef78c080cd8ba55a85445d5b36e214a81df20a
         with:
           username: ${{ secrets.DOCKER_USERNAME }}
           password: ${{ secrets.DOCKER_PASSWORD }}

       - name: Extract metadata (tags, labels) for Docker
         id:meta
         uses: docker/metadata-action@9ec57ed1fcdbf14dcef7dfbe97b2010124a938b7
         with:
           images: my-docker-hub-namespace/my-docker-hub-repository

       - name: Build and push Docker image
         uses: docker/build-push-action@3b5e8027fcad23fda98b2e3ac259d8d67585f671
         with:
           context: .
           file: ./Dockerfile
           push: true
           tags: ${{ steps.meta.outputs.tags }}
           labels: ${{ steps.meta.outputs.labels }}
The workflow above checks the GitHub repository, logs into the registry using login-action, and then uses the action build-push-action to: Build a Docker image Dockerfile based on the repository; push the image to Docker Hub, And apply tags to the image.
Publish the image to a GitHub package
You can trigger a workflow to publish an image every time you create a new version on GitHub. The workflow in the following example runs created when an event of activity type release is fired. For more information about the release event, see “Events that trigger workflows” .
In the example workflow below, we use the Docker login-action, metadata-action, and build-push-action actions to build a Docker image and, if the build is successful, push the built image to GitHub Packages.
The options required by the login-action GitHub package are:
registry: must be set toghcr.io.username: You can use the${{ github.actor }}context to automatically use the username of the user who triggered the workflow to run. See “Context” for details.password: You can use the automatically generatedGITHUB_TOKENpassword as the password. For more information, see “Automated Token AuthenticationAuthentication”.
The required options for metadata-action GitHub Packages are:
images: The namespace and name of the Docker image you are building.
The options required by the build-push-action GitHub package are:
context: Defines the build context as the set of files located in the specified path.push: If set totrue, the image will be pushed to the registry after it is successfully built.tagsandlabels: These are populated by the output ofmetadata-action.
# GitHub recommends pinning actions to a commit SHA.
# To get a newer version, you will need to update the SHA.
# You can also reference a tag or branch, but the action may change without warning.

name: Create and publish a Docker image

on:
   push:
     branches: ['release']

env:
   REGISTRY: ghcr.io
   IMAGE_NAME: ${{ github.repository }}

jobs:
   build-and-push-image:
     runs-on: ubuntu-latest
     permissions:
       contents: read
       packages: write

     steps:
       - name: Checkout repository
         uses: actions/checkout@v3

       - name: Log in to the Container registry
         uses: docker/login-action@65b78e6e13532edd9afa3aa52ac7964289d1a9c1
         with:
           registry: ${{ env.REGISTRY }}
           username: ${{ github.actor }}
           password: ${{ secrets.GITHUB_TOKEN }}

       - name: Extract metadata (tags, labels) for Docker
         id:meta
         uses: docker/metadata-action@9ec57ed1fcdbf14dcef7dfbe97b2010124a938b7
         with:
           images: ${{ env.REGISTRY }}/${{ env.IMAGE_NAME }}

       - name: Build and push Docker image
         uses: docker/build-push-action@f2a1d5e99d037542a71f64918e516c093c6f3fc4
         with:
           context: .
           push: true
           tags: ${{ steps.meta.outputs.tags }}
           labels: ${{ steps.meta.outputs.labels }}
Publish images to Docker Hub and GitHub packages
Within a single workflow, you can publish a Docker image to multiple registries by using login-action and actions on each registry. build-push-action
The following example workflow uses the previous section ("[Publishing images to Docker Hub](https://docs.github.com/en/actions/publishing-packages/publishing-docker-images#publishing-images-to-docker- hub)” and “Publishing images to GitHub packages") Follow the steps in to create a single workflow that pushes to both registries.
# This workflow uses actions that are not certified by GitHub.
# They are provided by a third-party and are governed by
# separate terms of service, privacy policy, and support
# documentation.

# GitHub recommends pinning actions to a commit SHA.
# To get a newer version, you will need to update the SHA.
# You can also reference a tag or branch, but the action may change without warning.

name: Publish Docker image

on:
   release:
     types: [published]

jobs:
   push_to_registries:
     name: Push Docker image to multiple registries
     runs-on: ubuntu-latest
     permissions:
       packages: write
       contents: read
     steps:
       - name: Check out the repo
         uses: actions/checkout@v3

       - name: Log in to Docker Hub
         uses: docker/login-action@f4ef78c080cd8ba55a85445d5b36e214a81df20a
         with:
           username: ${{ secrets.DOCKER_USERNAME }}
           password: ${{ secrets.DOCKER_PASSWORD }}

       - name: Log in to the Container registry
         uses: docker/login-action@65b78e6e13532edd9afa3aa52ac7964289d1a9c1
         with:
           registry: ghcr.io
           username: ${{ github.actor }}
           password: ${{ secrets.GITHUB_TOKEN }}

       - name: Extract metadata (tags, labels) for Docker
         id:meta
         uses: docker/metadata-action@9ec57ed1fcdbf14dcef7dfbe97b2010124a938b7
         with:
           images: |
             my-docker-hub-namespace/my-docker-hub-repository
             ghcr.io/${{ github.repository }}

       - name: Build and push Docker images
         uses: docker/build-push-action@3b5e8027fcad23fda98b2e3ac259d8d67585f671
         with:
           context: .
           push: true
           tags: ${{ steps.meta.outputs.tags }}
           labels: ${{ steps.meta.outputs.labels }}
project management
You can use GitHub Actions to automate project management tasks by creating workflows. Each workflow contains a series of tasks that are executed automatically each time the workflow runs. For example, you can create a workflow that runs every time an issue is created to add tags, leave comments, and move the issue to the project board.
Add labels
This tutorial demonstrates how to use the actions/github-script action in the workflow to mark newly opened or reopened issues. For example, you can triage to add a tag every time you open or reopen an issue. You can then view all questions that need triage by filtering questions with the label triage.
The actions/github-script action allows you to easily use the GitHub API in your workflow.
Create Workflow:
- Select the repository to which you want to apply this project management workflow. You can use an existing repository with write permissions or create a new repository. For more information about creating a repository, see “Creating a new repository” .
- In your repository, create a file named
.github/workflows/YOUR_WORKFLOW.ymland replaceYOUR_WORKFLOWwith a name of your choice. This is a workflow document. For more information about creating new files on GitHub, see “Creating new files”.
name: Label issues
on:
   issues:
     types:
       - reopened
       -opened
jobs:
   label_issues:
     runs-on: ubuntu-latest
     permissions:
       issues: write
     steps:
       - uses: actions/github-script@v6
         with:
           script: |
             github.rest.issues.addLabels({
               issue_number: context.issue.number,
               owner: context.repo.owner,
               repo: context.repo.repo,
               labels: ["triage"]
             })
- Customize the parameters in the
scriptworkflow file:
- The value is automatically set using the object
issue_number. You don’t need to change these.owner``repo``context - Change the value to
labelsfor the list of labels to be added to the question. Separate multiple tags with commas. For example,["help wanted", "good first issue"]. For more information about labels, see “[Manage Labels](https://docs.github.com/en/issues/using-labels-and -milestones-to-track-work/managing-labels#applying-labels-to-issues-and-pull-requests)”.
- Commit the workflow files to the default branch of the repository. For more information, see “Creating New Files”.
Issues moving assignments on the project board
This tutorial demonstrates how to use the alex-page/github-project-automation-plus action to automatically move issues to A specific column on the project board. For example, after assigning an issue, you can move it to a column on the In Progress project board.
Create workflow
- Select the repository to which you want to apply this project management workflow. You can use an existing repository with write permissions or create a new repository. For more information about creating a repository, see “Creating a new repository” .
- In your repository, select a project board. You can use an existing project or create a new one. For more information about creating projects, see “[Creating Projects (Classic)](https://docs.github.com/en/issues/organizing-your-work-with-project-boards/managing-project-boards /creating-a-project-board)”.
- In your repository, create a file named
.github/workflows/YOUR_WORKFLOW.ymland replaceYOUR_WORKFLOWwith a name of your choice. This is a workflow document. For more information about creating new files on GitHub, see “Creating new files”. - Copy the following YAML content into your workflow file.
# GitHub recommends pinning actions to a commit SHA.
# To get a newer version, you will need to update the SHA.
# You can also reference a tag or branch, but the action may change without warning.

name: Move assigned card
on:
   issues:
     types:
       -assigned
jobs:
   move-assigned-card:
     runs-on: ubuntu-latest
     steps:
       - uses: alex-page/github-project-automation-plus@7ffb872c64bd809d23563a130a0a97d01dfa8f43
         with:
           project: Docs Work
           Column: In Progress
           repo-token: ${{ secrets.PERSONAL_ACCESS_TOKEN }}
- Customize the parameters in the workflow file:
- Change the value of
projectto the name of your project board. If you have multiple project boards with the same name, thisalex-page/github-project-automation-plusaction will act on all projects with the specified name. - Change the value of
columnto the name of the column you wish to move the question to when assigning it. - Change the value of
repo-token:- Create a personal access token (classic)
repousing scope. For more information, see “[Managing your personal access token](https://docs.github.com/en/authentication/keeping-your-account-and-data-secure/creating-a-personal-access -token)”. - Store this personal access token as a secret in your repository. For more information about storing secrets, see “Encrypted Secrets”.
- In your workflow file, replace
PERSONAL_ACCESS_TOKENwith your key name.
- Create a personal access token (classic)
- Change the value of