Today we will take a look at the theory and practice of kubernetes and gitops
Command introduction
First, let’s take a look at the subnaming supported by kubectl for our convenience:
kubectl apply- applies the definition of one or more resources. Typically used to deploy applications or update resources.kubectl get- displays information about one or more resources. This is a common command to view the status of resources in a Kubernetes cluster.kubectl describe- Displays details of one or more resources, such as events, status, and configuration.kubectl delete- Delete resources in the Kubernetes cluster.kubectl exec- Execute commands in containers in the cluster.kubectl logs- Print container logs.kubectl create- Create one or more resources from a file or standard input.kubectl edit- Edit resources in the cluster. This will open an editor to modify the resource’s configuration.kubectl port-forward- Forward local ports to Pods in the cluster.kubectl run- Run a specified image in the cluster.kubectl scale- Adjust the number of replicas of resources (such as Deployment, ReplicaSet).kubectl rollout- Manage the deployment of resources, such as viewing status, pausing, resuming or rolling back updates.
**In addition to the above commands, kubectl in Kubernetes also supports annotations: **
The kubectl annotate command is used to add or update annotations (annotations) to resources in the Kubernetes cluster. Annotations are additional information that can be used to store non-identifying metadata. They are commonly used in management tools, libraries, and clients to store auxiliary information such as descriptions, version information, etc.
kubectl annotate [type] [name] [key]=[value]
Operator
Optrator and controller are two terms that are often confused. Kubernetes operator is an application-specific controller that extends the Kubernetes API to create, configure, and manage complex stateful application instances on behalf of actual Kubernetes users. It uses basic Kubernetes resources. It is built based on the concept of controller.
**All Operators use the Controller pattern, but not all Controllers are Operators. **
First of all, Controller is a core concept in Kubernetes. It is a loop that constantly monitors the status of the cluster and takes action when necessary to transform the current state into the desired state. Controllers do this by interacting with the Kubernetes API. For example, a Deployment Controller is responsible for ensuring that a specified number of Pod replicas are running.
In contrast, Operator is a more specific controller type. Kubernetes Operators are designed for managing complex, stateful applications. It not only includes standard controller functionality, but also extends the Kubernetes API to better manage the lifecycle of specific applications. For example, a database operator can be responsible for deploying the database, backing up data, restoring data, etc.
The key differences are:
- Controller is usually more general and is responsible for managing standard resources in Kubernetes, such as Pods, Deployments, etc.
- Operator is a special type of Controller designed to manage specific, often complex applications. They use Custom Resources to represent the application’s state and implement business logic specific to that application.
Therefore, all Operators use the Controller pattern, but not all Controllers are Operators. This is because all Operators are built on top of the Controller pattern, but Controllers don’t necessarily need to have the ability to manage complex logic and extend APIs for a specific application’s lifecycle, which is unique to Operators.
Implement an Operator
Now that we understand the basics of Controllers and the differences between Controllers and Operators, we are ready to implement an Operator. The example Operator will solve a real-world task: managing a set of Nginx servers with preconfigured static resource content. Change the Operator to support users specifying a list of Nginx servers and configuring static files installed on each service.
It is easy to think that ConfigMap is used by us to configure environment variables, command line parameters or scrolls.
Kubernetes controller can be implemented in any language. Let’s use bash to briefly introduce it.
Creating a complete Kubernetes Operator case, especially an Operator involving Nginx server management, can be divided into several main parts: defining CRD (Custom Resource Definition), writing Operator controller code, and deploying and testing the Operator. In this example, we’ll use a more common language like Go because it provides more powerful tools and libraries for interacting with the Kubernetes API. We will create a simple Operator by following these steps:
Define CRD
First, define a CRD to represent the Nginx configuration. This CRD will describe the properties of the Nginx instance, such as version, configuration file contents, and related static resources.
apiVersion: apiextensions.k8s.io/v1
kind: CustomResourceDefinition
metadata:
   name: nginxconfigs.example.com
spec:
   group: example.com
   versions:
     - name: v1
       served: true
       storage: true
   scope: Namespaced
   names:
     plural: nginxconfigs
     singular: nginxconfig
     kind: NginxConfig
     shortNames:
     -ngxconf
2. Write Operator controller
Use Go language to write Operator controller. The Operator controller will listen to the creation, update, and deletion events of the NginxConfig resource and perform corresponding operations.
package main

import (
     //Introduce necessary libraries
)

func main() {
     //Initialize the client and monitor changes in NginxConfig resources
     // Implement business logic: create/update/delete Nginx instance
}
3. Handle Nginx instance
In the controller, handle the creation and update of Nginx instances. When an NginxConfig resource is created or updated, the controller sets up the Nginx Pod according to the defined specifications, including the required configuration and static files.
4. Create Docker image and deploy Operator
Package the Operator into a Docker image, and then deploy this image in the Kubernetes cluster.
# Use appropriate base image
FROM golang:1.15

#Add Operator code
ADD ./operator
WORKDIR/operator

# Compile Operator
RUN go build -o operator .

# Set startup command
CMD ["./operator"]
Deploy to Kubernetes:
apiVersion: apps/v1
Kind: Deployment
metadata:
   name: nginx-operator
spec:
   replicas: 1
   selector:
     matchLabels:
       name: nginx-operator
   template:
     metadata:
       labels:
         name: nginx-operator
     spec:
       containers:
       - name: operator
         image: nginx-operator:latest
5. Test Operator
Create an NginxConfig instance to test the Operator:
apiVersion: "example.com/v1"
kind: NginxConfig
metadata:
   name: my-nginx
spec:
   version: "latest"
   staticContent: "Welcome to Nginx!"
Monitor the Kubernetes cluster to ensure that the Operator responds correctly to the creation of this NginxConfig instance.
Precautions
- Error handling and resource cleanup: Ensure that the Operator can handle errors and resource lifecycle gracefully.
- Permissions and Security: Ensure that Operators have appropriate permissions to manage Kubernetes resources and consider security.
- Testing and Validation: Fully test the behavior of the Operator before deploying it in production.
A simple introduction to CICD
Next, we first create a GitOps Operator to drive continuous delivery.
GitOps is a practice for continuous deployment that uses Git as the source of true state. In the GitOps model, all deployment and environment configurations are stored in a Git repository, which provides version control, audit trails, and rollback capabilities. To implement GitOps, we can create a GitOps Operator that will automate the deployment process from a Git repository to a Kubernetes cluster.
Steps to create a GitOps Operator
- Define the responsibilities of GitOps Operator:
- Monitor changes in Git repository.
- When definitions in the repository (such as Kubernetes deployment files) are changed, automatically apply these changes to the Kubernetes cluster.
- Ensure that the cluster state is consistent with the state defined in the Git repository.
- Select tools and frameworks:
- Use tools such as Operator SDK or Kubebuilder to simplify the process of creating and managing Operators.
- For Git interaction, you can use Git client libraries such as Go-git (for the Go language).
- Implement GitOps Operator:
- Use CRDs to define GitOps configurations, including Git repository URLs, branches, paths, etc.
- Write Operator controller logic to handle these custom resources, including cloning code from Git repositories, parsing Kubernetes configuration files, and applying them to the cluster.
- Deploy and test Operator:
- Containerize the Operator and deploy it to the Kubernetes cluster.
- Create GitOps configuration resources to test the Operator to ensure it correctly pulls and deploys configurations from Git repositories.
- Integrate continuous integration process:
- Integrate GitOps Operator into CI processes to automatically trigger updates to your cluster.
- Submit code to GitOnce in the repository, CI tools such as Jenkins, GitLab CI, or GitHub Actions can run tests, merge code, and trigger updates to Operator applications.
Implement GitOps Operator
Define GitOps CRD:
- Create a Custom Resource Definition (CRD) to represent GitOps configuration. This CRD should include the address, branch, and path of the Git repository.
apiVersion: apiextensions.k8s.io/v1
kind: CustomResourceDefinition
metadata:
  name: gitopsconfigs.gitops.example.com
spec:
  group: gitops.example.com
  versions:
    - name: v1
      served: true
      storage: true
  scope: Namespaced
  names:
    plural: Gitopsconfigs
    singular: gitopsconfig
    kind: GitOpsConfig
    shortNames:
    -goc
Write Operator Controller:
- Write Operator controllers in Go, Python or other programming languages.
- The controller should listen for changes in the GitOpsConfig resource and synchronize the configuration based on the Git repository information it defines.
- The controller should be able to clone configuration files from Git repositories, parse Kubernetes deployment files, and apply them to the cluster.
Build and deploy Operator:
- Create Docker images and deploy Operators to Kubernetes clusters.
Test Operator:
- Update Nginx configuration or version in Git repository.
- Observe whether the Operator automatically applies updates to the Kubernetes cluster.
Continuous Integration (CI) Integration
- Set up CI tools:
- Choose a CI tool (e.g. Jenkins, Travis CI, GitHub Actions).
- Set up a CI process in a Git repository to run tests on code commits.
- Automation trigger:
- Configure the CI tool to automatically notify the Kubernetes cluster after code changes are merged into the master branch, triggering GitOps Operator application updates.
Complete GitOps process
- Developers submit code to Git repository.
- CI tool runs tests when code is merged into master branch.
- GitOps Operator monitors changes in the Git warehouse and automatically synchronizes updates to the Kubernetes cluster.
Environmental Management
Different runtime environments and how Kubernetes namespaces define environment boundaries.
An environment is made up of three equally important parts:
- code
- Runtime that meets prerequisites
- configuration
Code:
Code is the machine instructions for an application to perform specific tasks. To execute the code, runtime dependencies may also be required. For example, Node.js code requires Node.js binary packages and other NPM packages to execute successfully. For Kubernetes, all runtime dependencies and code are packaged as a deployable unit (aka Docker image) and orchestrated through the Docker daemon. Docker images of applications can run with confidence in any environment, from a developer’s laptop to a production cluster running in the cloud, because the image encapsulates the code and all dependencies, eliminating potential incompatibilities between environments.
In software deployment, the environment is where code is deployed and executed. In the software development life cycle, different environments serve different purposes. For example, a local development environment (aka laptop) is where engineers can create, test, and debug new versions of code. After engineers complete code development, the next step is to commit the changes to Git and start deploying them to different environments for integration testing and eventual product release. This process is called Continuous Integration/Continuous Deployment (CI/CD) and typically consists of the following environments:
- QA
- E2E
- Stages and Products
In a QA environment, new code is tested against hardware, data, and other production-like dependencies to ensure correctness of the service. If all tests pass QA, the new code will be promoted to the E2E environment as a stable environment for testing/integration of other pre-release services. QA and E2E environments are also called pre-production (preprod) environments because they do not host production traffic or use production data. When a new version of code is ready for production release, the code is typically deployed first in the Stage environment (which has access to the actual production dependencies) to ensure that all production dependencies are in place before the code enters the Prod environment. For example, new code may require a new database schema update, and the Stage environment can be used to verify that the new schema is correct. The configuration directs test traffic only to the Stage environment so that any issues introduced by the new code do not affect actual customers. However, Stage environments are typically configured to use “real” production database operations. Tests performed in a Stage environment must be carefully reviewed to ensure they are safe for use in production. After all tests pass in Stage, the new code will eventually be deployed into Prod for live production traffic. Because both Stage and Prod have access to production data, they are both considered production environments.
Namespace Management
Namespaces are a natural construct in Kubernetes to support environments. They allow cluster resources to be divided among multiple teams or projects. Namespaces provide scope for unique resource naming, resource quotas, RBAC, hardware isolation, and network configuration:
Kubernetes namespace~=environment
Within each namespace, an application instance (aka Pod) is one or more Docker containers with environment-specific application properties injected during deployment. These application properties define how the environment should run (such as feature flags) and which external dependencies should be used (such as database connection strings). In addition to application Pods, a Namespace can contain other Pods that provide additional functionality required by the environment.
Namespace is equivalent to the environment in Kubernetes. Namespaces can be represented by Pods (application instances), network policies (ingress/egress) and RBAC (access control), as well as application dependencies running in separate Pods.
RBAC is a method of managing access to computer or network resources based on the roles of individual users within an enterprise. In Kubernetes, a role contains rules that represent a set of permissions. Permissions are purely additive (no negative rules). Roles can be defined in a namespace using Roles or cluster-wide using Cluster Roles. Namespaces can also have dedicated hardware and network policies to optimize their configuration based on application needs. For example, CPU-intensive applications can be deployed in a namespace with dedicated multi-core hardware. Another service that requires heavy disk I/O can be deployed in a separate namespace with a high-speed SSD. Each namespace can also define its own network policies (ingress/egress) to restrict cross-namespace traffic or use unqualified DNS names to access other namespaces in the cluster.
Environment simulation
Simulate two environments, namely test environment (qa) and non-production e2e environment (e2e)
First, create the guestbook-qa and guestbook-e2e namespaces for each of your guestbook environments:
$ kubectl create namespace guestbook-qa
$ kubectl create namespace guestbook-e2
$ kubectl get namespaces
Now you can deploy the guestbook application to the guestbook-qa environment using the following command:
$ export K8S_GUESTBOOK_URL=https://raw.githubusercontent.com/kubernetes/website/main/content/zh-cn/examples/application/guestbook/redis-leader-deployment.yaml
$ kubectl apply -n guestbook-qa -f ${K8S_GUESTBOOK_URL}/redis-master-deployment.yaml
Query the Pod list to verify that the Redis Pod is running:
$ kubectl get pods -n guestbook-qa
NAME READY STATUS RESTARTS AGE
redis-leader-5596fc7b68-wxjvp 1/1 Running 0 77s
Run the following command to view the logs in the Redis Deployment:
$ kubectl logs -f deployment/redis-leader -n guestbook-qa
1:C 26 Nov 2023 05:57:07.309 # oO0OoO0OoO0Oo Redis is starting oO0OoO0OoO0Oo
1:C 26 Nov 2023 05:57:07.309 # Redis version=6.0.5, bits=64, commit=00000000, modified=0, pid=1, just started
1:C 26 Nov 2023 05:57:07.309 # Warning: no config file specified, using the default config. In order to specify a config file use redis-server /path/to/redis.conf
1:M 26 Nov 2023 05:57:07.311 * Running mode=standalone, port=6379.
1:M 26 Nov 2023 05:57:07.311 # Server initialized
1:M 26 Nov 2023 05:57:07.311 # WARNING you have Transparent Huge Pages (THP) support enabled in your kernel. This will create latency and memory usage issues with Redis. To fix this issue run the command 'echo never > / sys/kernel/mm/transparent_hugepage/enabled' as root, and add it to your /etc/rc.local in order to retain the setting after a reboot. Redis must be restarted after THP is disabled.
1:M 26 Nov 2023 05:57:07.311 * Ready to accept connections
Create Redis leader service
The message board application needs to write data to Redis. Therefore, a Service needs to be created to forward Redis Pod traffic. Service defines the policy for accessing Pods.
The message board application needs to write data to Redis. Therefore, you need to create Service to forwardRedis Pod traffic. Service defines the policy for accessing Pods.
[application/guestbook/redis-leader-service.yaml](https://raw.githubusercontent.com/kubernetes/website/main/content/zh-cn/examples/application/guestbook/redis-leader-service. yaml)
# Source: https://cloud.google.com/kubernetes-engine/docs/tutorials/guestbook
apiVersion: v1
Kind: Service
metadata:
   name: redis-leader
   labels:
     app: redis
     role: leader
     tier: backend
spec:
   ports:
   - port: 6379
     targetPort: 6379
   selector:
     app: redis
     role: leader
     tier: backend
Use the following
redis-leader-service.yamlfile to create a Redis service:$ kubectl apply -f ./guestbook/redis-leader-service.yaml -n guestbook-qaQuery the service list to verify whether the Redis service is running:
$ kubectl get -n guestbook-qa serviceThe response should be similar to this:
NAME TYPE CLUSTER-IP EXTERNAL-IP PORT(S) AGE
redis-leader ClusterIP 10.68.10.77 <none> 6379/TCP 3s
illustrate:
This manifest file creates a Service named redis-leader, which contains a set of tags that match the previously defined tags, so the service routes network traffic to the Redis Pod.
Set up Redis followers
Although the Redis leader has only one Pod, you can configure it to be highly available by adding several Redis followers to meet traffic demands.
# Source: https://cloud.google.com/kubernetes-engine/docs/tutorials/guestbook
apiVersion: apps/v1
Kind: Deployment
metadata:
   name: redis-follower
   labels:
     app: redis
     role: follower
     tier: backend
spec:
   replicas: 2
   selector:
     matchLabels:
       app: redis
   template:
     metadata:
       labels:
         app: redis
         role: follower
         tier: backend
     spec:
       containers:
       - name: follower
         image: gcr.io/google_samples/gb-redis-follower:v2
         resources:
           requests:
             cpu: 100m
             memory: 100Mi
         ports:
         - containerPort: 6379
Create a Redis Deployment using the following
redis-follower-deployment.yamlfile:$ kubectl apply -f ./guestbook/redis-follower-deployment.yaml -n guestbook-qaVerify that two Redis follower copies are running by querying the Pods list:
$ kubectl get -n guestbook-qa pods
Next, we also test whether the guestbook-qa environment meets our expectations.
Then the same goes for guestbook-qa to be upgraded to the guestbook-e2e environment.
Then similarly test whether the guestbook-e2e environment is working properly.
Network isolation
A key aspect of defining the environment in which your application is deployed is ensuring that only target clients have access to the specific environment. By default, all namespaces can connect to services running in all other namespaces. But with two different environments, say QA and Prod, you don’t want crosstalk between those environments. Fortunately, namespace network policies can be applied to restrict network communication between namespaces. Let’s see how to deploy the application to two different namespaces and control access using network policies. We’ll cover the steps to deploy a service in two different namespaces. You’ll also modify network policies and observe their effects.
Egress traffic is network traffic that begins inside a network and pro-EGRESSceeds through its routers to a destination somewhere outside the network.
Egress traffic is network traffic that starts inside the network and passes through the router to a destination outside the network.
Ingress traffic is composed of all the data communications and net-INGRESSwork traffic originating from external networks.
Ingress traffic consists of all data traffic and network-INGRESS work traffic from the external network.
Before you begin, verify thatVERIFY KUBERNETES CLUSTER CONNECTIONyou have correctly configured your KUBECONFIG environment variable point to the desired Kubernetes cluster. Please refer to appendix A for more information.
Before you begin, verify that you have correctly configured the KUBERNETES CLUSTER CONNECTION environment variable to point to the desired Kubernetes cluster. Please see Appendix A for details.
And by default, Pods running in one namespace can send network traffic to other Pods running in different namespaces. We will prove this by executing a url command from the Pod in the qa namespace to the Nginx pod in the prod namespace. at this point:
$ kubectl describe pod web -n prod | grep IPz
$ kubectl -n qa exec curl-pod -- curl -I http://<web pod ip>
$ kubectl -n prod exec curl-pod -- curl -I http://<web pod ip>
Generally you never want to have interdependencies between qa and prod environments. If both instances of the application are configured correctly, there will be no dependency between qa and prod, but what if there is a bug in qa’s configuration and it accidentally sends traffic to prod? You may corrupt production data. Even in a production environment, what if one environment hosts your marketing site and another environment hosts an HR application containing sensitive data? In these cases, it may be appropriate to block network traffic between namespaces or only allow traffic between specific namespaces. This can be done by adding a network policy to the namespace. Let’s add a network policy for our Pods in each namespace:
$ kubectl apply -f block-other-namespace.yaml
Git Strategy
The three situations for Git in GitOps are single branch (multiple directories), multiple branches, multiple code bases and single code base
- Single branch (multi-directory) strategy: This strategy uses a single Git branch to manage all configuration files, but places the configurations for different environments (such as development, testing, and production) in different directories . The advantage of this approach is that it is simple and easy to manage because the configuration of all environments is in one place. But the disadvantage is that problems may be propagated due to tight coupling of configurations. For example, incorrect configurations may affect multiple environments.
- Multi-branch strategy: In this strategy, different Git branches are created for different environments such as development, testing and production. The advantage of this is that it can better isolate the configurations of different environments and reduce the impact of misconfigurations on other environments. The disadvantage is that more branch management effort is required, and synchronizing changes between branches can become complicated.
- Multiple codebases vs. single codebase: The difference here is whether to store all configurations centrally in one codebase or to spread them across multiple codebases. The advantages of a single code base are centralized management and consistency, while the advantages of multiple code bases are greater flexibility and maintainability, especially in large or complex projects.
Each strategy has its advantages and disadvantages, and which one you choose depends on your organization’s needs, the size of your team, the complexity of your project, and your attitude toward risk management. Often, these strategies may be used in combination to suit different projects and organizational structures.
Configuration Management
Environment configuration management can create a directory in each environment that contains a YAML list of all resources that should be deployed. All values in these YAML lists can be hard-coded to the specific values required for that environment.
To deploy, run:
$ kubectl apply <directory>
A SaaS application developer deploys his custom application to one or more environments (dev, test)
These environments may be distributed across different accounts, clusters or namespaces. There are subtle differences between them, so configuration reuse is paramount.
helm
As the first configuration tool to appear, helm is an indispensable part of the Kubernetes ecosystem.
The following are the main features of Helm and its role in the Kubernetes ecosystem:
- Application Package Management: Helm can be thought of as the package manager for Kubernetes. It allows developers and operators to package applications and their dependencies into a unit called a “chart”. These charts are collections of preconfigured Kubernetes resources that can be easily deployed and managed on a Kubernetes cluster.
- Simplify complex deployment: Helm makes it easy to deploy complex applications. It can manage complex dependencies and ensure that all Kubernetes components are deployed in the correct order and configuration. This is especially important for large applications that require multiple services and configurations.
- Easy to version control and rollback: Helm charts are easy to version control, which means you can track changes to each deployment and easily roll back to older versions when needed.
- Sharing and Reuse: Through the Helm repository, users can share their charts, making reuse of configurations easy. This promotes the sharing of best practices and community collaboration.
- Configuration flexibility: Helm allows users to customize chart configuration to adapt to different environments and needs. This flexibility is achieved through the use of templates and configuration files, which can be modified at deployment time.
- Integration and extensibility: Helm can be integrated with other KubernetesTools and plug-ins are seamlessly integrated, increasing its extensibility. This makes it adaptable to a variety of different deployment needs and environments.
###Jsonnet
Jsonnet, as a programming language, is primarily designed to enhance and simplify the declaration and processing of JSON data. Although it was not designed specifically for Kubernetes, it did gain widespread use and popularity in the Kubernetes community. The following are the key features of Jsonnet and its role in data processing:
- Enhanced JSON: Jsonnet can be regarded as a superset of JSON. It adds variables, conditional expressions, functions, arithmetic operations and other programming language features based on JSON. These extensions make Jsonnet ideal for handling complex data descriptions and configuration files.
- Template and Abstraction: Jsonnet supports high-level abstraction and templating, which is particularly useful for managing large amounts of data with similar structures. Users can define common patterns and structures and then reuse them in different contexts, reducing duplication and errors.
- Flexibility and maintainability: By providing variables and functions, Jsonnet makes the maintenance of data files more flexible and easier to manage. This is especially important for configurations that require frequent updates or modifications.
- Clear logical structure: The programming language features of Jsonnet allow users to write and understand complex data structures in a clearer and logical way, which is a huge advantage for complex configuration management.
- Application in Kubernetes: Although Jsonnet is not specifically designed for Kubernetes, it shows great potential in managing Kubernetes configuration files. It can generate complex Kubernetes resource definitions such as deployments, services, and pod configurations, and supports advanced configuration modes.
- Community support and tool integration: Due to the popularity of Jsonnet in the Kubernetes community, many tools and libraries have been developed to support the generation and management of Jsonnet files. This further enhances its use in modern cloud-native architectures.
Pipeline
Stages in the CICD pipeline
Continuous integration (CI) is a software development practice in which all developers merge changes into a central repository (GIT). Through CI, each code change (commit) triggers a given repository. Automate the build and test phases and provide feedback to developers who make changes. The main difference with GitOps compared to traditional CI is that the CI pipeline also updates the application manifest with the new image version after the build and test phases are successfully completed.
Continuous delivery (CD) is the automation of the entire software release process.
Unlike traditional CICD, GitOps Operator is used to monitor changes in the manifest and coordinate deployments. As long as the CI build is completed and the manifest is updated, the GitOps Operator will
Continuous integration
Proceed as follows:
The process will start from “Pull Request” and go through multiple stages such as “Code Review”, “Vulnerability Scanning”, “Code Analysis”, “Build”, “Unit Testing”, “Code Coverage”, “Docker Build”, “Docker Push”, “Git Clone Configuration Repository”, “Update Configuration List”, “Git Submit and Push”, “Publish CI Metrics”, and finally reach “Build Notification”.
Integrate Go language and other tools:
- GitHub Actions integration: Various stages in the flow chart, such as “code review”, “vulnerability scanning”, “code analysis”, etc., can be automated through GitHub Actions. This means each step can be configured as a workflow in GitHub Actions, allowing for automation and process control.
- Go language related tools:
- Code Review: Integrate Go language code review tools such as
golintorgometalinter. - Vulnerability Scanning: Use vulnerability scanning tools for the Go language, such as
gosec. - Code Analysis: Apply static analysis tools such as
staticcheck. - Unit testing: Use Go’s own testing framework and
go testcommand. - Code Coverage: Use Go’s
covertool to check test coverage.
- Code Review: Integrate Go language code review tools such as
- Docker and Go: During the Docker build phase, you can use the Dockerfile for Go applications to ensure that the application is packaged correctly.
- Configuration Management: For the “Git clone configuration warehouse” and “update configuration list” stages, you can consider using Go language configuration management tools such as
ViperorConsulto better manage and maintain the configuration. .
Continuous Delivery
After continuous integration, we enter the stage of continuous delivery.
A complete CD pipeline based on GitOps CICD
- Git Clone Configuration Repository: This step remains unchanged as part of configuration management.
- Discovery Inventory: This may involve automated scripts or tools that detect and organize the application’s configuration items and dependencies.
- kubectl apply: Apply configuration changes or deploy new services in the Kubernetes environment.
- Functional Testing: Perform automated functional testing to verify the functionality and performance of the application.
- Runtime vulnerability scanning: Use tools suitable for Kubernetes environments to detect runtime security vulnerabilities.
- Publish CD Metrics: Collect and publish deployment-related metrics, possibly through integrated monitoring tools or custom scripts.
Promote promotion work
We know that Kubernetes manifests and code are generally not placed in the same warehouse, which allows for more flexible deployment options, better access control and auditing capabilities. So where should we maintain specific environment-dependent application configurations, such as database connections and distributed caches.
- Separate configuration repository: Create a separate repository to store environment-specific configuration files. This approach provides clear separation, ensuring code and configuration are managed independently while facilitating tracking and auditing.
- Configuration management tools: Use configuration management tools, such as Helm, Kustomize or Terraform, to manage and apply configurations in different environments. These tools can help you adjust configurations based on environment differences (e.g. development, test, production).
- Secret Management: For sensitive information (such as database passwords and access keys), use the Kubernetes secrets management function to store it. These secrets can be dynamically mounted into the container at deployment time.
- Configuration Mapping (ConfigMaps): For non-sensitive configuration information, such as database links and application parameters, Kubernetes’ ConfigMap can be used to store it. ConfigMap can be provided to the application as an environment variable or mounted volume when the container starts.
- Environment variables: In some cases, it is useful to use environment variables directly in the Kubernetes deployment configuration to pass configuration information. This method is suitable for simple configurations that do not require frequent changes.
- GitOps Practice: Use GitOps to manage Kubernetes configuration. In this mode, all configuration changes are made through the Git repository and applied to the Kubernetes environment through an automated process. This helps ensure configuration consistency and traceability.
In GitOps practice, git reset and git revert are two important Git commands, which are used to handle configuration changes and maintain history. Understanding the differences and usage scenarios of these two commands is critical to effectively managing Kubernetes configurations.
- git reset:
- The
git resetcommand is used to undo certain commits, it can move the HEAD pointer to the specified commit. - In GitOps, if you need to undo a series of recent commits and roll back the warehouse state to a specific previous commit, you can use
git reset. - It should be noted that
git resetwill change the history, which may cause problems in shared repositories. Other developers need to usegit pull --forceto synchronize changes, which can lead to chaos.
- The
- git revert:
- The
git revertcommand is used to undo a specific commit, but it does not change the history. Instead, it creates a new commit with the opposite state of the commit being undone. - In GitOps, if you need to undo a specific change while preserving subsequent changes, and don’t want to modify the history,
git revertis a better choice. git revertis more suitable for public repositories or team environments because it does not affect other developers' history.
- The
My personal development experience is that I don’t use
revert, but useresetlocally. The premise is that I have a clear understanding of the tree diagram I submitted. However, I still userevertin production. This It is a very safe and installation method.
This is the same understanding as git rebase and git merge.
merge and rebase Merge means merging, and rebase means resetting the base. Now we have two branches like this, test and master, and the commits are as follows:
      D---E test
     /
A---B---C---F master
Execute git merge test on the master and you will get the following results:
      D--------E
     /\
A---B---C---F---G test, master
Execute git rebase test on the master and get the following results:
A---C---D---E---C `---F` test , master
You can see that the merge operation will generate a new node, and the previous submission is displayed separately. The rebase operation does not generate new nodes, but merges the two branches into one linear operation.
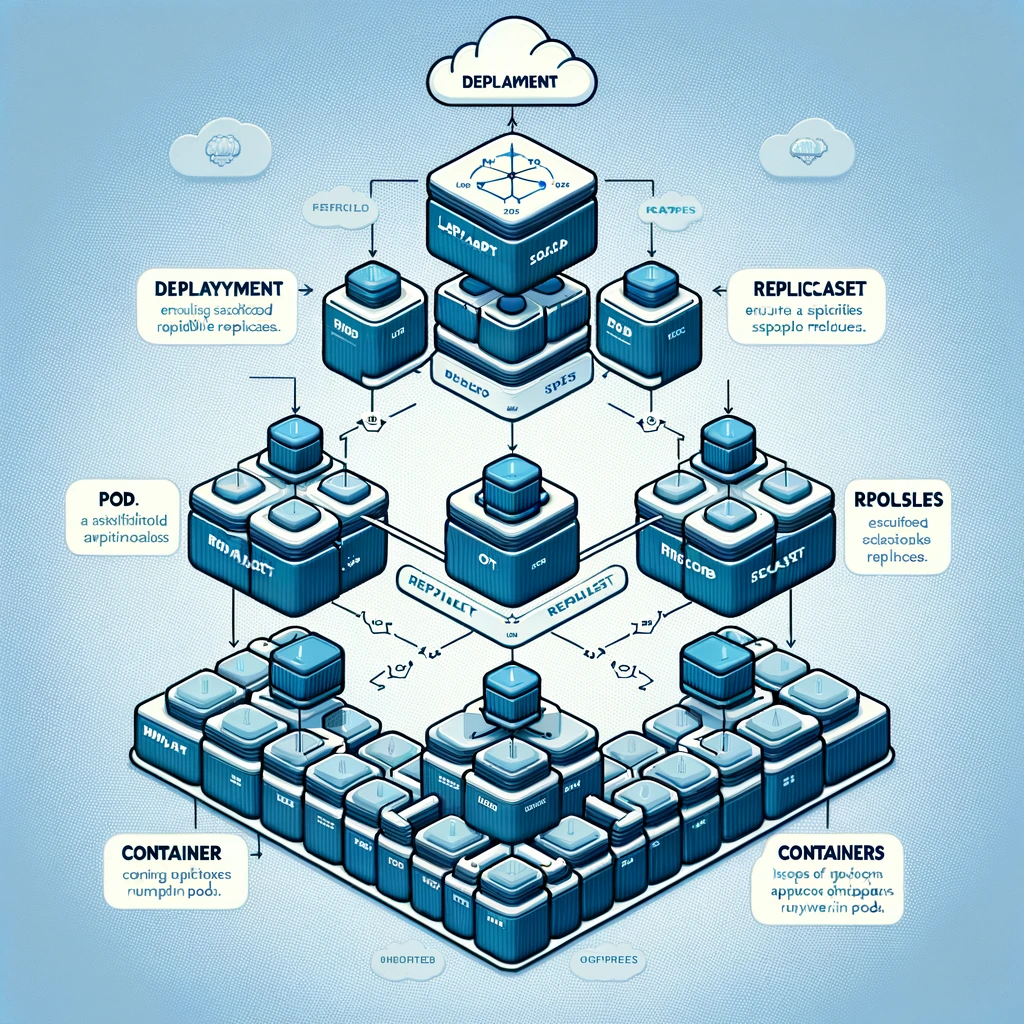
Deployment strategy
In Kubernetes, you can deploy a Pod using only a manifest with a PodSpec and ensure its availability. In this case, you can customize the ReplocaSet manifest to keep a stable set of Pod replicas running at any given time. ReplicaSet is used to identify Pods by specifying a selector.
ReplicaSet is not declarative and therefore not suitable for GitOps
I didn’t know that Deployment is a higher level abstraction, and although it is possible to directly deploy a single Pod using a manifest with a PodSpec, this approach is generally not suitable for ensuring the availability and manageability of the Pod.
ReplicaSet
- Role: The main purpose of
ReplicaSetis to ensure that a specified number of Pod replicas are running at any time. - Selector: It identifies the Pod to manage by using a label selector. These labels are specified in the Pod’s definition.
- Disadvantages: Although
ReplicaSetcan ensure that a specified number of Pod instances are always running, it does not natively support rolling updates. If you need to update a Pod’s definition (for example, update the container image used), you will need to manually update theReplicaSet, or delete and recreate it.
###Deployment
- Higher level abstraction:
Deploymentis a higher level abstraction that provides more functionality on top ofReplicaSet. It not only ensures the number of Pods, but also supports declarative updates of Pods andReplicaSet. - Rolling updates:
Deploymentsupports rolling updates, allowing you to gradually replace older versions of Pods with newer versions without causing downtime. - Suitable for GitOps: Due to its declarative nature,
Deploymentis well suited for GitOps workflows. You declare the desired state of your application in a Git repository, then use automation tools such as Argocd or Flux to monitor the repository and apply changes to the Kubernetes cluster.
Traffic Routing Traffic Routing
In Kubernetes, Service is an abstraction that defines a logical set of Pods and policies for accessing them. The Pod targeted by the service is determined by the following selector
Fields in Service minifest. The service then forwards traffic to Pods with matching labels specified by the selector. If the underlying Pods are stateless and backward-compatible, the Service can be round-robin load balanced and is well suited for rolling updates. If you need to customize load balancing for your deployment, you’ll need to explore other routing alternatives.
When the Service receives traffic, it forwards the traffic to Pods with corresponding matching labels based on the defined selector. For example, if the Service’s selector is set to match the label “color: blue”, then all Pods with this label will receive traffic forwarded by the Service. This approach makes traffic management both flexible and efficient.
Stateless Pods and Load Balancing
If the underlying Pods are stateless and maintain backward compatibility, the Service can achieve effective round-robin load balancing. This is especially important for implementing rolling updates, as it allows for the gradual replacement of older Pods without disrupting service.
Customize load balancing and routing strategies
For deployments that require more complex routing logic or custom load balancing, you may want to explore the other routing alternatives provided by Kubernetes. For example, using Ingress Controllers and Ingress Resources can provide more advanced routing capabilities, such as URL-based routing, SSL/TLS terminal encryption, and load balancing policies.
Tag-driven routing
Service routing in Kubernetes is entirely label-based. This means that, for example, a Service tagged “blue” will only route traffic to Pods tagged “blue”, while a Service tagged “green” will only route traffic to Pods tagged “green” . This design allows for simple and intuitive traffic distribution and management.
NGINX Ingress Controller
NGINX Ingress Controller is a powerful tool for managing traffic entering your cluster in a Kubernetes environment. It supports multiple load balancing and routing rules for a wide range of use cases. Key features include:
- Front-End Load Balancer: It can be configured as a front-end load balancer and is responsible for handling all traffic entering the cluster.
- Custom Routing: Supports various custom routing functions, such as TLS terminal encryption, URL rewriting, and traffic routing based on custom rules.
- Traffic Distribution: Rules can be configured to distribute traffic, such as routing 40% of traffic to a service with a specific label (such as “blue”) and 60% to another label (such as “green”) services.
Through these capabilities, NGINX Ingress Controller can effectively manage and optimize traffic entering the Kubernetes cluster.
Istio Gateway
Istio Gateway is another key component used to manage traffic at the edge of a Kubernetes cluster. It is primarily responsible for handling HTTP and TCP connections entering and leaving the cluster. Key features of Istio Gateway include:
- Edge Load Balancer: As a load balancer at the edge of the cluster, it handles all traffic entering and leaving the cluster.
- Port and Protocol Specifications: Istio Gateway allows you to define a set of ports to be exposed, as well as related protocol types, ensuring that traffic flows according to established rules and protocols.
- Integration with Istio Service Mesh: As part of the Istio ecosystem, it is tightly integrated with Istio’s service mesh capabilities, providing advanced traffic management and security features.
Diagrams illustrating the flow of traffic through the Ingress controller in Kubernetes and the flow of traffic in the Istio service mesh are ready. These diagrams clearly compare how each system handles traffic routing and management in a Kubernetes environment, including the roles of ingress controllers and Istio gateways.
Argo Rollouts
What are Argo Rollouts?
Argo Rollouts is a Kubernetes controller for more complex and powerful deployment strategies such as Blue-Green Deployments and Canary Deployments. It makes it easier to update and manage applications without disrupting service by extending the deployment capabilities of Kubernetes itself.
Installing & Using Argo Rollouts
Prerequisites:
- Make sure you have a running Kubernetes cluster.
- You need to have sufficient permissions to deploy new Kubernetes resources.
Installation command:
Argo Rollouts can be installed directly from its GitHub repository via its Helm chart or using kubectl.
Install using Helm (if you use Helm):
helm repo add argo https://argoproj.github.io/argo-helm
helm install argo-rollouts argo/argo-rollouts
Alternatively, use kubectl to install from its GitHub repository:
kubectl create namespace argo-rollouts
kubectl apply -n argo-rollouts -f https://raw.githubusercontent.com/argoproj/argo-rollouts/stable/manifests/install.yaml
Define Rollout resource
Create Rollout resource definition:
- The Rollout resource is similar to Kubernetes' Deployment resource, but it contains additional fields to specify a deployment strategy (such as canary or blue-green deployment).
- Create a YAML file that defines your Rollout, including mirrors, number of replicas, update strategy, etc.
Example Rollout definition:
apiVersion: argoproj.io/v1alpha1
Kind: Rollout
metadata:
  name: example-rollout
spec:
  replicas: 3
  selector:
    matchLabels:
      app: example
  template:
    metadata:
      labels:
        app: example
    spec:
      containers:
      - name: app
        image: your-image:latest
        ports:
        - containerPort: 8080
  strategy:
    canary:
      steps:
      - setWeight: 20
      - pause: {duration: 1h}
Trigger and manage deployments
Apply Rollout resources:
Use kubectl to apply your Rollout definition:
kubectl apply -f your-rollout-definition.yaml
Monitor Rollout status:
Use kubectl to check Rollout status:
kubectl argo rollouts get rollout example-rollout --watch
Manage Rollout:
- New deployments can be triggered by updating the definition of a Rollout resource (for example, changing the image tag).
- Using Argo Rollouts' CLI tool, you can manage the pausing, resuming, and aborting operations of Rollout.
Core features of Argo Rollouts
- Advanced deployment strategy: Supports blue-green deployment and canary deployment, etc.
- Automated rollback: If there is a problem with the new version, it can automatically roll back to the previous stable version.
- Weighted traffic distribution: You can control the traffic distribution ratio between the new version and the old version.
- High integration: Tightly integrated with service meshes and Ingress controllers such as Istio and NGINX Ingress.
- Blue-Green Deployment:
- First, you deploy the new version (the green version) without affecting the currently running old version (the blue version).
- Once the green version is ready and has been tested to verify its stability, traffic will be smoothly transferred from the blue version to the green version.
- If the green version runs well, the deployment is complete; if there are problems, you can switch back to the blue version immediately.
- Canary Deployment:
- In this strategy, you gradually introduce a small portion of user traffic to a new version (the canary version).
- Initially, only a small amount of traffic is routed to the new version while its performance and stability are monitored.
- If the new version performs well, you can gradually increase the proportion of traffic until all traffic is transferred to the new version.
- If there is a problem with the new version, the transfer of traffic can be stopped immediately and routed back to the old version.
Blue and Green Release
We already know that rolling updates with declarative Deployment support is a great way to update your application, because your application will use roughly the same amount of resources during deployment, with zero downtime and minimal impact on performance. However, there are many legacy applications that don’t work well with rolling updates due to backwards incompatibility or statefulness. Some applications may also require deploying a new version and immediately switching to that version, or quickly rolling back if something goes wrong. For these use cases, blue-green deployment would be the appropriate deployment strategy. Blue-green deployments accomplish this by having both deployments fully scaled at the same time, but only directing incoming traffic to one of the two deployments.
Here we use the Nginx Ingress controller to route 100% of the traffic to blue or green deployment, because the built-in kubernetes service only supports iptables and does not reset the existing link with the pod, so it is not suitable for blue-green deployment.
In a Kubernetes environment, while declarative Deployments provide zero downtime and minimal impact on performance through rolling updates, there do exist certain situations and application types where this approach may not be the best choice. . Especially for stateful applications or legacy applications that are difficult to roll out due to backward incompatibility, Blue-Green Deployment may be more suitable.
Iptable
Iptables is a powerful firewall tool on Linux that is used to control network traffic in and out of Linux systems. It is based on the network packet filtering framework provided by Netfilter, allowing system administrators to configure rule sets to filter traffic and provide NAT functionality.
Main features and functions
- Packet Filtering:
- Iptables can filter data packets in and out of the system, including source address, destination address, transmission protocol, etc.
- It can accept, reject or drop packets, providing precise control over network traffic according to defined rules.
- Chain and table:
- Iptables is organized using Chains and Tablesrule.
- Common chains are INPUT, OUTPUT and FORWARD, which control the flow into, out of and through the system respectively.
- Tables such as
filter,natandmangletables are used for different types of traffic processing.
- NAT (Network Address Translation):
Iptablessupports NAT functions, including source address translation (SNAT) and destination address translation (DNAT).- This is important for routing and forwarding traffic to private addresses within the internal network.
- Status Tracking:
- Iptables can track the status of network connections such as new, established, associated and invalid connections.
- This allows applying rules based on connection status, increasing filtering flexibility and effectiveness.
Application scenarios
- Safety Protection:
- Enforce firewall rules on servers and network devices to prevent unauthorized access and attacks.
- Traffic Management:
- Manage and restrict specific types of traffic to optimize network usage.
- Network Debugging:
- Track and monitor network traffic to help diagnose network problems.
Usage examples
Block traffic from specific IP addresses:
iptables -A INPUT -s 123.456.789.0 -j DROPAllow traffic on specific ports:
iptables -A INPUT -p tcp --dport 22 -j ACCEPT
The flexibility and power of Iptables make it a key tool for managing network traffic and enforcing security policies in Linux systems. However, due to its complexity, it is recommended to use it with caution in a production environment and to conduct adequate testing before applying any rules.
How blue-green deployment works
The core idea of blue-green deployment is to maintain two completely different versions of the production environment (or deployment) at the same time: a blue (Blue) version and a green (Green) version.
- Blue Deployment: The older version currently running.
- Green Deployment: New version, same as Blue Deployment but with updates.
Both deployments will be fully scaled, but at any moment, only one deployment (blue or green) will receive all incoming traffic.
Use Nginx Ingress controller to implement blue-green deployment
Traffic Routing:
In blue-green deployments, the Nginx Ingress controller can be used to route 100% of traffic to either blue or green deployments. Or route part of the traffic to the blue deployment and part of the traffic to the green deployment.
Hahaha But this doesn’t seem to be blue-green deployment, it’s a bit like canary deployment:
If your requirement is to distribute traffic to both blue and green deployments, then you may want to consider using a canary deployment (Canary Deployment). In a canary deployment, the new version (the canary) initially receives only a small portion of the traffic, while the main traffic is still routed to the old version. Gradually increase the proportion of traffic flowing to the new version based on its performance and stability.
This is accomplished by updating the Ingress resource, which determines which service (blue or green) will receive traffic.
Limitations of Kubernetes Service:
- Kubernetes Service is implemented based on iptables and will not reset existing connections to Pods.
- This means that when performing a version switch, some existing connections may still point to the old version of the Pod, which is not the best choice for applications that require immediate switching and fast rollback.
- Therefore, for blue-green deployments, using an Ingress controller like Nginx can better manage traffic switching because it can control the routing of traffic more precisely.
Use Deployment to implement blue-green deployment
The diagram illustrating the concept of Blue-Green Deployment in a Kubernetes environment using NGINX Ingress and Deployments is ready. It visually explains how traffic is directed to either the Blue or Green Deployments, showcasing the clear separation and traffic management between these two deployments.
To use Ingress to implement blue-green deployment in Kubernetes, you need to prepare two identical but different versions of application deployments (Deployments), an Ingress controller (such as NGINX), and an Ingress resource to control traffic routing. Below are the steps and sample code to implement this strategy.
Design
- Prepare two Deployments:
- A “blue” Deployment that runs the current version of the application.
- A “green” Deployment that runs the new version of the application.
- Configure Service:
- Create a Service for each Deployment. These Services will serve as entry points for traffic.
- Set up the Ingress controller:
- Make sure you have an Ingress controller such as NGINX installed and running in your Kubernetes cluster.
- Write Ingress resources:
- Create an Ingress resource to define traffic routing rules. Initially, route all traffic to the blue Deployment.
- Update Ingress resources when preparing to switch traffic to a green Deployment.
- Monitoring and Switching:
- Ensure the green Deployment is fully ready and tested before switching traffic.
- Switch traffic from blue to green Deployment by updating Ingress rules.
- If the new version is running normally, continue to route traffic to the green Deployment; if there are problems, you can quickly switch back to the blue Deployment.
Sample code:
Blue Deployment (blue-deployment.yaml):
apiVersion: apps/v1
Kind: Deployment
metadata:
   name: blue-deployment
spec:
   replicas: 2
   selector:
     matchLabels:
       app:myapp
       version: blue
   template:
     metadata:
       labels:
         app: myapp
         version: blue
     spec:
       containers:
       - name: myapp
         image: myapp:blue
Green Deployment (green-deployment.yaml):
apiVersion: apps/v1
Kind: Deployment
metadata:
   name: green-deployment
spec:
   replicas: 2
   selector:
     matchLabels:
       app: myapp
       version: green
   template:
     metadata:
       labels:
         app: myapp
         version: green
     spec:
       containers:
       - name: myapp
         image: myapp:green
Combined with argo Rollouts
To combine Argo Rollouts with blue-green deployments, you can define and manage blue-green deployment processes through Argo Rollouts while taking advantage of its powerful flow control and automated rollback capabilities. This requires you to install the Argo Rollouts controller in your Kubernetes cluster and define the corresponding Rollout resources in place of the standard Deployment resources.
Combined with argo Rollouts design solution
- Install the Argo Rollouts controller:
- Make sure Argo Rollouts is installed in your Kubernetes cluster.
- Define Rollout resource:
- Instead of traditional Deployment resources, use Rollout resources to define your application deployment.
- Specify blue-green deployment strategy in Rollout configuration.
- Configure Service:
- Define Service to point to Pods managed by Rollout.
- Configure Ingress:
- Use Ingress resources to control external traffic entering your service.
- Traffic transfer:
- Leverage the ability of Argo Rollouts to manage traffic transfers from blue to green.
Sample code
Rollout resources (
blue-green-rollout.yaml):apiVersion: argoproj.io/v1alpha1 Kind: Rollout metadata: name: bluegreen-rollout spec: replicas: 2 selector: matchLabels: app:myapp template: metadata: labels: app: myapp spec: containers: - name: myapp image: myapp:latest strategy: blueGreen: activeService: myapp-active previewService: myapp-preview autoPromotionEnabled: falseActive Service (
active-service.yaml):apiVersion: v1 Kind: Service metadata: name: myapp-active spec: selector: app: myapp ports: - protocol: TCP port: 80 targetPort: 8080Preview Service (
preview-service.yaml):apiVersion: v1 Kind: Service metadata: name: myapp-preview spec: selector: app: myapp rollouts-pod-template-hash: <HASH> ports: - protocol: TCP port: 80 targetPort: 8080Ingress Resource (
ingress.yaml):apiVersion: networking.k8s.io/v1 Kind: Ingress metadata: name: myapp-ingress spec: rules: - http: paths: - path: / pathType: Prefix backend: service: name: myapp-active port: number: 80
In this scheme, activeService and previewService represent the currently active version and the preview (new version) of the service respectively. Argo Rollouts automatically manages the blue-green deployment process according to configuration, including traffic transfer. You can trigger new deployments by updating the image version in the Rollout resource, and use Argo Rollouts' command-line tools to control traffic shifts and facilitate new version releases.
Canary deployment
Canary deployment is a technique that:
Canary Deployment is a software release technique that takes a step-by-step approach when updating applications to minimize risks. This strategy is named after the history of miners using canaries as a safety warning system. In the context of software deployment, it represents the process of gradually introducing new versions of an application so that they can be tested and validated before full deployment.
Features
- Gradual rollout:
- New versions are initially released to only a small number of users or environments, while most users still use the old version.
- Risk Control:
- If a new version performs poorly (such as with bugs or performance issues), it affects a limited range of users and can be quickly rolled back.
- Real-time feedback:
- Provides opportunities to observe new releases in real-world environments and collect real-time feedback and performance data.
Implementation steps
- Initial Release:
- New versions are initially visible only to a small group of users or a subset of traffic.
- Monitoring and Evaluation:
- Continuous monitoring of new releases for performance, stability and user feedback.
- Gradually increase coverage:
- If the new version performs well, gradually increase its reach to users or traffic.
- Full deployment or rollback:
- Based on feedback and monitoring results, decide whether to fully deploy the new version or roll back to the old version.
Application scenarios
- High Risk Updates: For updates that may have a significant impact on system stability or user experience.
- Large Applications: In large or complex applications, different user groups may react differently to updates.
- Continuous Deployment Environment: In agile development and continuous integration/continuous deployment (CI/CD) environments, canary deployment can serve as an effective risk management tool.
Use Ingress and Deployment to implement canary deployment
Design
- Prepare two Deployments:
- One for the current version (for example, marked
version: stable). - The other is a new version (for example, marked
version: canary).
- One for the current version (for example, marked
- Configure Service:
- Create a Service for each Deployment.
- Configure Ingress:
- Use the Ingress resource to define the traffic distribution strategy and designate a portion of the traffic to the new version.
Sample code
Stable Deployment (
stable-deployment.yaml):apiVersion: apps/v1 Kind: Deployment metadata: name: myapp-stable spec: replicas: 3 selector: matchLabels: app: myapp version: stable template: metadata: labels: app: myapp version: stable spec: containers: - name: myapp image: myapp:stableCanary Deployment (
canary-deployment.yaml):apiVersion: apps/v1 Kind: Deployment metadata: name: myapp-canary spec: replicas: 1 # Lesser replicas as it's a canary release selector: matchLabels: app: myapp version: canary template: metadata: labels: app: myapp version: canary spec: containers: - name: myapp image: myapp:canaryService (
service.yaml):yamlCopy codeapiVersion: v1 Kind: Service metadata: name: myapp-service spec: selector: app: myapp ports: - protocol: TCP port: 80 targetPort: 8080Ingress resource (
ingress.yaml):- Here you need to use specific features of the Ingress controller to distribute traffic (e.g. weight distribution for NGINX Ingress).
Use Argo Rollouts to implement canary deployment
Design
- Install Argo Rollouts:
- Make sure Argo Rollouts is installed in your Kubernetes cluster.
- Define Rollout resource:
- Use Rollout resources to define application deployment and specify canary policies.
- Configure Service:
- Define Service to point to Pods managed by Rollout.
- Monitoring and Management Deployment:
- Leverage the tools provided by Argo Rollouts to monitor and manage the deployment process.
Sample code
Rollout resources (
canary-rollout.yaml):apiVersion: argoproj.io/v1alpha1 Kind: Rollout metadata: name: myapp-rollout spec: replicas: 4 selector: matchLabels: app: myapp template: metadata: labels: app: myapp spec: containers: - name: myapp image: myapp:new-version strategy: canary: steps: - setWeight: 20 - pause: {duration: 48h} - setWeight: 50 - pause: {duration: 48h}Service (
service.yaml):- Same as the Service in the Ingress and Deployment methods above.
With Argo Rollouts, management of deployments and traffic distribution becomes simpler and more intuitive. You can more precisely control the proportion of traffic to new releases and leverage the automation features of Rollouts to monitor the health of your deployment and automate rollbacks
Progressive deployment
Progressive deployment is a fully automated version of canary deployment. Rather than testing for a fixed period of time before scaling up a canary deployment, progressive interaction continuously monitors the health of the pod and scales up until it is fully scaled.